Posted on

Make that Blanket Bigger

Learn how to make that blanket bigger. I have been getting several people asking how to make different patterns bigger. This is a great skill to have as there are so many beautiful striped baby blankets that we wish we could increase. Here is your chance to take charge of this process.

There are a few things that you need that aren’t on the usual crocheting supply list.

Supplies

  • The first is a postal or food scale that weighs in grams.
How to Crochet that Blanket Bigger : this is a photo of my postal scale
  • A yarn label for the yarn you will be using to crochet the afghan. (Almost all yarn is measured in grams.) Stylecraft Special DK has 100 grams per skein.
  • A calculator for figuring the math part along with a pencil and paper. I use my afghan planner book that I made out of a composition book. You should use the worksheet.
  • The yarn that matches the yarn you will be using. (I will be using some stash Stylecraft Special DK for this purpose.)
  • A crochet hook of the correct size for your project.
  • Scissors
  • The Free PDF worksheet

Weigh the Yarn

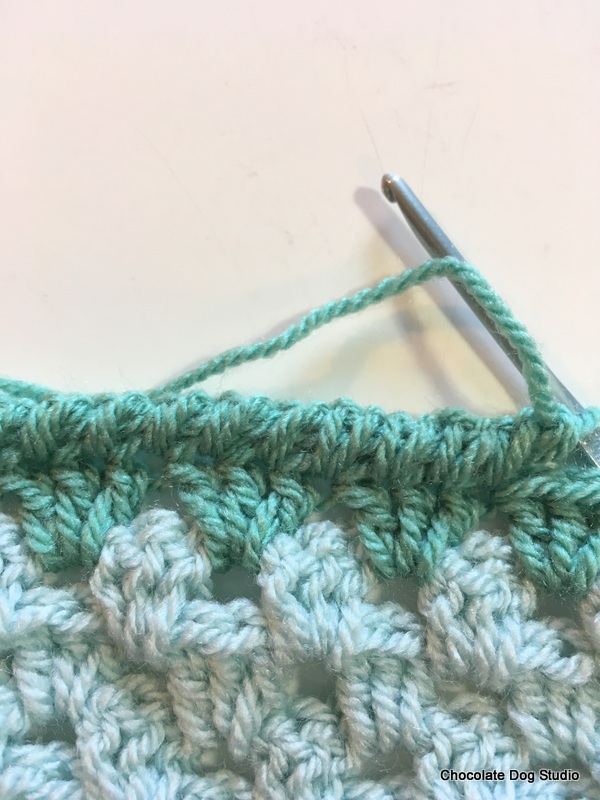
Start by crocheting the foundation chain to the desired length in the yarn weight you will use for the crochet blanket. Then crochet the first set of color rows on the chain.

Ie: If you are creating a baby version of a granny stripe then crochet a length of chain about 36″ long. Crochet the first two rows, tie off and cut your yarn.

How to Crochet that Blanket Bigger: This is a photo of my bowl on the postal scale with the weight zeroed out.

( I apologize for how yucky and old my postal scale looks. )

Then you put a bowl on your postal scale and turn it on. It should zero out the weight of the bowl, in other words it is ignoring the weight of your bowl and will just weigh your crocheting. Add your crocheted strip to the bowl. Write down the weight of the 2 rows.

There are two rows of green in this afghan pattern.

Check the Width

You will need to decide how wide to create that crochet blanket. Read the pattern you are adapting and see what the measurements are. Most smaller blankets do not have the width to proportionally carry the width. Baby blankets run about 36″ wide and many adult blankets or throws vary from 45-60 inches wide depending how large you will creat the blanket.

There will need to be some rows added to the width. How are you going to do that. The crochet blanket above has a mirror effect from the center green stripe.

The beautiful cotton waves baby blanket stretched out flat showing the beautiful striping
Yikes, Stripes! Afghan 2

The blankets above have a varied striping sequence and you could simply repeat the first striping sequences again until the blanket is the right size.

Make that Blanket BIgger

The Sunshine and Shadows afghan would require you to add rows in the middle sections of color. It might be as simple and crocheting each row twice which would double the size or only crochet the vibrant middle sections twice which would increase it a smaller amount. Whichever you choose to do be sure to add these rows to your stitch count as you prepare the worksheet.

Count the Rows

Count how many rows are in the blanket using each color. You can use the gauge to figure out how many rows there will be in the width that you want the blanket to be.

Using the yarn label take the weight of the yarn and divide it by the weight of the completed row of color. This will tell you the approximate number of color rows you can crochet using each skein. Next do the math for each color and figure out how many skeins you will need for the blanket.

Don’t forget to figure in yarn for the border while you are figuring out the yarn. Add the border rows to the stripe you crocheted earlier and see what it weighs in grams. Then multiply the weight by 4 to see how many skeins you will need. If there are multiple colors in the border rows simply weight before you add the next color and makes notes of the weights.

Check Your Math

(Note: If there are different stitches in it, crochet and weight each stitch row. Every stitch style uses a different amount of yarn which gives you a different weight of yarn.

  • Use the same yarn to do your figuring as the pattern you will be crocheting.
  • Be sure to check your gauge and make sure that you are crocheting at your usual tension.

Believe me, knowledge is valuable and think how free you are now! You can increase the size of any striped afghan from ripples to simple granny stripes easily using this method.

New Crochet Blankets in the Works

The brown scrap blanket
A new baby blanket for the shop

Talk to you later,

Karen

Posted on

Christmas Chains, Yarn and Crochet

Christmas chains, yarn and crochet; there isn’t much painting this week. The studio is full of soft goods right now, quilts for small grandkids, yarn from Black Friday shopping, products to ship and projects to finish. Are you ready for a small breather in your hectic schedule? I know that we are. Some time off doing what we love, maybe a little home repair, a little deep cleaning, a ton of family time, church time and time to reflect. Like you, we live a rather normal life; well, as normal as it can get. Family time has been a little more intense the past several months. It is good to see that some crochet is starting to happen again. It fills a deep need to create and is more portable than painting and it keeps me balanced.

Yarn Shopping

This post contains affiliate links

Crochet has been filling my time more since Black Friday shopping. My crochet momentum is back, finally! The family knew when the soft squishy packages started arriving that Black Friday shopping had been a serious occupation for the Studio. Good thing that some of these projects have used up a little of the yarn. Hopefully, the projects planned for the yarn will work up quickly and fill the Etsy shop. A few photos of the beautiful colors soon to be coming your way with new patterns (hopefully) or remakes of older patterns in new colors.

Christmas Chains


Christmas Chains

Crochet

Here is a little of what I have been working on these days.

Christmas Chains

The Baby Hexi which seemed to take all summer.

Christmas Chains

A new take on the Ruby Red with Lion Brand Landscapes “Twilight” (Amazon link) just to give folks another viewpoint of the Ruby Red in colors other than pink/red.

I also worked on a cute crocheted paper chain style garland for the Christmas tree. Super simple to crochet. I used all of the silvery yarn on hand and created two separate chains. The instructions are included below.  Here they are in process. These chains were fairly quick and I crocheted a bunch in one color and then joined them with the other color. Super fast and easy, great for beginners or children for learning to crochet. Also great for using up small bits of scrap yarn!

Here they are on the tree.


A few more more links will be added when there is a little more time. They were crocheted out of silvery grey and red Stylecraft Special DK but they would be beautiful out of bright cotton yarns or all white, even tropical colors would be beautiful. Crochet them any color and it will still add a fun look to your Christmas tree.

Christmas Chains Garland Pattern

Supplies

  • DK weight yarn in Red and silvery grey,
  • Size G crochet hook
  • Scissors
  • Large eye needle for sewing links.

Link:

Chain 25,

First row: HDC in the third chain from hook and HDC across the chain, keeping the chain untwisted.

Second row: chain 2 HDC in each stitch across the the previous row. Tie off and cut with a long tail.

Sew one end to the other using whip stitch.

Finished one chain. Continue creating links being sure when sewing to link the chains together to create a Christmas Garland.

Merry Christmas!

Merry Christmas, Happy Holidays and Happy New Year everyone. All online shops are open this year for the next several  weeks. We have family visiting and hubs in off work for weeks between December 17 and January 1st. Should you need any help on any crocheting or orders, please bear this in mind. I will be stopping by to check on things but not as often. The last day to order from Etsy and Amazon for Christmas delivery is Tuesday Dec. 11th.

Merry Christmas and Talk to you later,

Karen

Posted on

The Adapted Lemon Peel Dishcloth Tutorial

Here is the next crochet washcloth/dishcloth pattern; The Adapted Lemon Peel dishcloth.

(This post has affiliate links)

The super easy  Adapted Lemon Peel Dishcloth is fun to crochet. It creates a lovely nubby texture without too much thinking about repeats or counting. It has a soft bumpy look which is great in a dishcloth. This pattern would also make a wonderful spa washcloth for an easy crochet Birthday or Christmas gift. Crochet 2-3 in different colors, add the washcloth to a few lovely soaps and you have an inexpensive and lovely gift for a new mother or a special friend.

The Adapted Lemon Peel Dishcloth Tutorial

Here is the washcloth first finished.

The Adapted Lemon Peel

Supplies

  • Cotton dishcloth yarn  (link)
  • Size G crochet hook  (link)
  • Scissors

Skills Needed

  • single crochet = SC
  • chain
  • double crochet = DC
  • Weave in ends

The Adapted Lemon Peel

Crochet 32 stitches in your cotton yarn.

Foundation Row

SC across the chain to create a foundation for your washcloth. (I am using a different color cotton yarn for these instructions.)

The Adapted Lemon Peel

Row 1

Single crochet in the  2nd chain from the hook. Double crochet in the next chain,

sc in the next 4 chains.The Adapted Lemon Peel

Alternate between the double crochet and  4 single crochets across the washcloth.

Chain 1 turn

(The double crochets will  to need to be on one side of the washcloth, poke them through to whichever side you pick for the front.)

The Adapted Lemon Peel

Row 2

The Adapted Lemon Peel

Sc in the  first stitch of the previous row.

3 sc in next  3 stitches, DC in the next stitch

Alternate 4 sc, 1 DC across the washcloth.

Alternate row 1 and row 2 until the washcloth is square.

I like to unplug and have paper patterns at times, so there is a free download  for The Free Pattern :Adapted Lemon Peel Dishcloth in the shop.

Other Stuff

We have been helping a chick fly out of the nest this week and build another nest in a first apartment. Part of me is so excited and the other part of me is a tiny bit anxious. Mom’s tend to do this; be anxious, happy and excited all at the same time. The other part of the excitement is that the studio will finally get to move into a more permanent home with a door and nothing but studio items inside. I truly can’t wait but feel wrong to be too excited. Is it wrong to want your chicks to leave the nest?

I spent some time watercolor painting with a friend as we both needed the nudge to do something out of our normal routine. I attempted to paint roses again. These are really simple and today they look much better than they did yesterday. I need to go and look at the other paintings I finished. They might look better as well.

 I’ve been working steadily on this afghan but have had to take a break on it due to the busyness of life and some arthritis issues this week.

Take care and enjoy your week. The sun is shining here even though the temps dipped a little lower earlier this week.

This beautiful daffodil is blooming in my garden and bring a great touch of spring to the yard.

Talk to you later,

Karen

P.S. I would like to think that I invented The Adapted Lemon Peel stitch, but I am pretty sure that I didn’t. If you know the name of it, let me know and I will change the title and credit the stitch. The nearest I could find was the Lemon Peel stitch. There are so many outlets for finding new crochet stitches; from magazines, books and the internet that it is difficult to search back and find the source of your inspiration.

Posted on

How to Multi-Strand Crochet and the Table Runner

How to Multi-Strand Crochet!

I love multi-strand crochet. The projects work up quickly and is a great stash buster. You can crochet everything from a pillow cover to an afghan or a rug. It just depends on how many strands of yarn you use at one time and how big a hook you use. The most difficult part of Multi-Strand crochet is keeping the yarns from tangling, but if you pull the skeins from the center and use a bowl for all little balls of yarn, the tangling can be kept manageable.

The Fall Table Runner

The pattern for this table runner is more like a list of guidelines. It uses some of my stash and scrap yarns that I NEEDED to use up as they are taking up valuable storage space. They are also colors that I do not use all the time and were not going to be used, unless I made a special effort. When you take multi-strands + creating it to fit your table + picking through your own yarns = a multi-step process. Not hard but more complicated than I usually write.

Motivation 

 This is a perfect project to use up some yarns in your stash and also all those little tiny scrap balls of yarn.

This is also a great home decor project as you can match the colors in your home. You will need at least three skeins of yarn and a large plastic or wooden hook. The large hook is the key to the whole thing! It will make the project quicker than you can imagine and also grab all those strands of yarns. Pick colors that you will want to have in your house, or to give as a hostess or Christmas gift. It can even be a mix of fiber content, but be sure to tell your gift recipient how to care for the table runner.

What follows is more of an outline rather than a pattern. Feel free to adapt these guidelines to create anything from mug mats to rugs for your home. 

Yarn Choices 

  1. Pull out all the yarns you never use. Hunt out the little bitty balls of leftover yarn from previous projects. Pick a color range. Since this is a Fall table runner. I was looking for browns, beige, oatmeal,  creams, orange, yellows, and any yarns with mostly those colors in them
  2. Sort the yarn into weight groups; worsted, bulky, fingering, laceweight, dk, home dec. t shirt yarn.
  3. Then I weighed it to see how much of each type of yarn I had.  I had more than 20 oz of yarn.

You can see that I have

  • tiny balls of yarn
  • some t shirt type yarn
  • almost three full skeins of lion brand yarn
  • some really Bulky brown yarn
  • the yellow granny square
  • camo look yarn
  • enough creams/ beige yarns to use these as the base yarn to keep it harmonized. (These didn’t make it to the photos  and I didn’t end up using the really thick brown yarn.)

The Rules

  • Use off white, cream or oatmeal yarns throughout the crocheting.
  • The overall gauge (or thickness) of the yarn group is more of a concern than the number of strands-try to keep this gauge consistent.
  • Try to crochet roughly half of each accent (orange, yellow and camo) yarn and then use in the 2nd half of the table runner. This adds continuity in the overall color of the crocheted item.
  • finish one tiny yarn ball then just tie on the next yarn ball
  • try to stagger tying on new yarns to help hide knots
  • only add one new yarn at a time. Which also helps to hide the knots.
  • crochet about 2 rows of accent color before changing to another accent color
  • Use a plastic hook large enough to easily hold all the different strands at one time. (I used a large plastic P hook with this project.)

Note: These are my rules – but you can change them to fit your yarns.

The Colors

  • Primary color: beige, off white, cream- used throughout the table runner.
  • Accent colors: yellow, camo, dark brown, cranberry, orange,
  • 2nd accent colors: variegated yarns, variegated string yarns
  • Put the yarns in your lap or a bowl and get started.

(Adding in a very small fingering gauge or crochet cotton doesn’t add much to the gauge of the yarn group and I was trying to use those up as they have been in the stash for far too long and I don’t use them often enough to warrant keeping them.)

Instructions

Using three or more yarns and your large crochet hook crochet a chain the length needed to fit your table minus 6 inches (3 inches each side for the fringe).When our family gathers for meals we have two leaves in our table which makes our table is 84″ long. The table runner is 62″ long. The table runner uses 14.1 oz of yarn.

Single crochet with all three or more yarns across the chain. Adding or changing yarn as necessary. Chain one and turn at each end of the table runner continue in SC the length of the table runner.

Continue adding rows until your table runner is the width you want. You will want to reserve roughly half of each accent color of yarn for the other half of the table runner. (This keeps the table runner color balanced.)

Crochet an odd number of rows to achieve the width that looks best on your table. My table runner is seven rows wide but would look good with 9-11 rows. Tie off and cut the yarns.

Fringe

Cut six inch lengths of the leftover yarns and using the larks head knot attach one group of five yarns each to each stitch at the end of each row on both ends of the table runner. Mix up colors and textures of the yarns to get a similar look to the table runner. Trim the fringe level across the ends to get a straight edge if needed.

Multi-Strand Crochet Inspiration

Just to inspire you, I found a couple of photos of my favorite multi strand crocheting using yarns of different weights. This poncho was crocheted using an Etsy friend’s scrap and stash yarns. She was selling them and I fell in love with all of the colors and textures. I added more of the yarns I had on hand  + the Basketweave stitch and this was the result.

Multi-Strand Crochet

Multi-Strand Crochet

The blue afghan shown here uses three strands of the same weight yarn to create an ombre effect. You do have to be careful not to create an item with such heavy fabric that it is not useable.

____________________________________________________________

We are nearing the end of September and Fall is really here! I am excited about the next few months as the Holidays are coming up and life gets busier. Take time out to enjoy the beauty of the season and the yarn in your basket. I am also getting ready to put this table runner and Autumn decorations out.

Talk to you later,

Karen

P.S. I think Multi-strand crochet would be wonderful for the pet beds people make for the animal shelters- just be sure to use washable yarns.

Posted on

3 Super Easy Crochet Borders: The Reverse Single Crochet Border

reverse single crochet border

I avoided this border for years; the reverse single crochet border. I mean, does anything sound more complicated?

Reverse crocheting – isn’t it hard enough to do going forward? I mean, really, who would want to crochet in reverse?!

To be honest, this is really a very simple border. It uses so little yarn. It’s the perfect edging for an already busy afghan. It is quite the perfect finish and ends up looking like a braid.  Continue reading 3 Super Easy Crochet Borders: The Reverse Single Crochet Border

Posted on

Tutorial: How to Sew Bias Tape

I have found a secret for sewing bias tape to make ties or loops. I was sewing pot holders and I need to be able to sew the hanging loop. I usually use ribbon but I have a ton of bias tape. Both my Mom and my Mother in Law had tons of bias tape and I inherited it. I usually use wide double fold bias tape but this stash bias tape is really skinny. Here is my tutorial on how to sew bias tape.

You need one of these pressure feet for your sewing machine.


Tutorial: How to Sew Bias Tape

Here is the edge stitch pressure foot or the stitch in the ditch foot. Put the bias tape in past the feed dog so that it will be starting about an inch in on the bias tape. Adjust the needle until you get the stitching right where you want it.


Tutorial: How to Sew Bias Tape

I hold the bias tape down and do not pin. You can sew rather slowly and do a good job. Stopping for pins is a pain and makes your sewing a bit more jagged. I advise practicing on scrap bias tape.

Tutorial: How to Sew Bias Tape

I always sew the open edge first.

Tutorial: How to Sew Bias Tape

It is much better than I usually do sewing without this pressure foot.

Tutorial: How to Sew Bias Tape

Here are both sides sewn. You can see at the top of the photo that if you don’t pay attention the sewing can still get wonky. So, pay attention… the pressure foot isn’t a magic wand for perfect edge stitching but it does help a huge amount.

It has been a wild morning as we found our dogs roaming the neighborhood. After a mad dash for shoes, a quick trip in the car, they are finally both home. It gets the adrenaline running in an unpleasant way. We are all now WIDE awake and a tad bit grouchy. The dogs are happy as they have had an early morning run and breakfast!


Talk to you later,

Karen

Posted on

Challenge Blanket and instructions!

Here it is in all of its glory, the challenge blanket and the instructions! I started this in the 100 items in 100 days challenge  and I meant for it to be the very last entry but I just couldn’t wait to get this finished.Challenge Blanket and instructions!

I love granny square blankets, but this one is great too! It has one thing going for it that the Granny Square blankets don’t. Can you guess what it is?Challenge Blanket and instructions!

It has no holes! That is right, absolutely no holes for the air to get through. So, if you want to crochet a blanket for a non-Granny Square lover this is the one to use!   I used DK weight yarn for this blanket as it was what I had on hand and a G sized hook.Challenge Blanket and instructions! Challenge Blanket and instructions! Challenge Blanket and instructions!

This is a super simple pattern and I am going to share it with you right now! If you need a more complete pattern, I am pretty sure that there is already one on Ravelry.com.

Chain the length you want the blanket to be as a multiple of four. Half double crochet in each chain across.

2nd row.

chain five, skip the first two half double crochets and half  double crochet in the third, half double crochet in the fourth chain two and skip the next two half doubles, half double in the next two and continue in this pattern across the blanket.

3rd row.

Chain two and turn. You will have a funny loopy thing there at the start. Double crochet down into the 2nd row into the first half double that you skipped and then double crochet again into the second half double that you skipped in the row previously.
Chain two and continue in this pattern across the blanket.

This is the basic pattern if you have any problems just let me know.

The last row in the blanket you double crochet into the spaces and half double into the tops of the double crochets of the previous row.

To finish it out I simply crocheted a simple grey  border around all the edges of the blanket with two chains in each corner stitch.

Let me know if you make one! I would love to see it.

Talk to you later,

Karen

P.S. This one is for sale in the ChocolateDogStudio.etsy.com shop!

https://www.etsy.com/listing/186196415/hand-crochet-blanket-afghan-multicolor

Posted on

Basket Liner Tutorial

2014-01-06 15.19.10

This isn’t a step by step How-To with pattern pieces. I will show you how to measure your basket to get some approximate measurements so you can make a basket liner for your baskets at home.

I have a large wicker basket that I dearly love. It holds my yarn quite nicely. It holds a bunch of yarn and then fits under my coffee table, but it snags my yarn. I received my Michael’s sales flier by e-mail today and noticed the lovely things for organizing your home. It is January and I do have the organizing bug. So, making use of what I have and improving something I already own is a huge money saver.2014-01-06 14.40.46I have some beautiful fabric that my Mom gave me. In fact I recovered my ironing board with it. I love it. It is bright and cheerful without being in your face.

2014-01-06 15.14.58

I cut this pattern from a left over piece of wrapping paper. I put the basket down and drew around it. This is the bottom.

2014-01-06 14.40.50

Then I placed the base of the basket liner in the bottom of the basket and did some trimming to make it fit a little better. 2014-01-06 14.46.28

2014-01-06 14.46.31

2014-01-06 14.46.41


Here you can see that it fits better but seems to not be the same shape. So I folded the bottom in half and trimmed the extra off.

2014-01-06 14.48.05

2014-01-06 14.49.23


Here you can see that I am getting ready to cut out the base piece out of fabric. I left 1/4 inch seam allowance all the way around the base.

2014-01-06 14.41.55 2014-01-06 14.42.02 2014-01-06 14.42.08 2014-01-06 14.42.14


I laid the basket on its side and rolled it from one side to the other as I drew the pattern of the side. 2014-01-06 14.50.31

Then I placed it up against the inside of the basket. I left extra at either end but trimmed the side a little bit.

2014-01-06 14.50.43

I cut the fold over cuff. I didn’t measure and I didn’t have a pattern piece for this part. I did lay one piece on top of the other and cut the three of them all the same size. I know that I probably won’t need that much extra but you never know.


2014-01-06 15.01.26

I sewed one side seam of the basket sides and then matched up the sides to the bottom part of the liner. I sewed them right sides together.

2014-01-06 15.01.42 2014-01-06 15.00.52

I placed the liner in the basket to see if it fit. It does

2014-01-06 15.00.41

There is a pleat at one of the ends of the basket liner and I left one side seam unsewn. I then folded the cuff in two and sewed two of the pieces together. I then matched up the edges and sewed the sides of the basket and the cuff together. It wasn’t too difficult and yes, I did not use pins!

2014-01-06 15.14.53

When I was finished one side seam of the basket liner wasn’t completed. I placed the liner in the basket to see if it would fit. It didn’t quite fit. It needs another two to three inches. So, I added a Gusset!

Here is the definition of a gusset from the free online dictionary.

gus·set  (gst)

n.

1. A triangular insert, as in the seam of a garment, for added strength or expansion.
2. A triangular metal bracket used to strengthen a joist.
3. A piece of mail or plate armor protecting the joints in a suit of armor.

[Middle English, from Old French gousset, perhaps diminutive of gousse, pod, husk.]


I could see that I would need to add a triangular piece of fabric into the side or gusset and that it needed to have the cuff on the top as well.

2014-01-06 15.14.58

I added the gusset in and the basket liner fits pretty good.

2014-01-06 15.14.44

The photo directly above shows you the gusset. I like it and it works great!  I saved money and used what I had on hand to improve my organization in my house. Actually, to make it easier to crochet or knit. The basket holds about 20 balls of yarn and fits under my coffee table which makes it easier for people to walk around when I am not using the yarn (which is hardly ever)!

Thanks,

Karen


Posted on

January 7, 2014


2014-01-06 11.46.15

The weather was bitterly cold for our part of the world. Oklahoma is not known for the temperatures in the teens. The snow is pretty but under the snow is a nice coating of ice.

2014-01-06 11.46.25

This is the view off of my front porch.

2014-01-06 11.47.19Here is the back deck and yard. The ice isn’t as bad as it was last time but it is colder.

I stayed in and thought about goals, deadlines, chores and menus. Then I thought of this!

2014-01-06 15.19.10


Yes, I am procrastinating on my cleaning! A basket liner for my favorite large yarn basket. It has turned out better than I thought.  Why is it that the New Year starts and we all get the organizing bug! Anyway this isn’t much of a tutorial more of a how to do it  yourself for your basket. The tutorial will come tomorrow.

Talk to you later,

Karen


Posted on

Owl Applique

I have been working on owls lately and decided to make an applique for free download.   This tutorial is photo rich as I feel that one picture is worth more than one thousand of my words and probably much clearer as well. This owl is simplified and  super easy for beginner applique seamstresses. You can use this as a patch on a blanket, pillow, pants, where ever you decide to use it.

I put my owl on a cross body bag for my daughter. It is a perfect size for her phone, glasses, a pen and anything else she wants to carry. It has a zipper on the top and a strap that can be used several different ways. I used up-cycled denim, fabric scraps and  some jelly roll strips and a remnant for the lining. There will be a tutorial for the bag later.

Cut out your pattern pieces. Pin them to the fabric of your choice and then cut them out.


You can use a fusible web tape  behind each piece to keep it aligned. I didn’t do this as I used pins and it isn’t rocket science.  The background is a 4  x 6 piece of recycled denim.


Center your body onto the background fabric. Pin it to keep it straight.

Here are the wings, and eye patch cut out.

You will need to adjust the settings on your sewing machine. Mine has a button to keep the needle down when the machine stops stitching. You will want to do this either manually or simply push the button.

Change your stitch to the blanket stitch. You also need to change the stitch width. I put my stitch width to about a 2.5 or 3.  

Position your needle at the edge of the body shape so that the straight stitch will be on the denim or background fabric. The blanket part of the stitch will be into the body of the owl.

See that little bit where my attention wandered.  Thankfully it fits under a wing and I don’t feel any compulsion to rip it out and start over.

Ahh, this is the right way to sew it.

One wing placed, pinned and sewn… and now to the other.

Pin all your pattern pieces together so you don’t lose any.

Place the beak and pin it like so. Sew down one side and then move the pin to the last edge you will sew. I simply leave the needle down and lift the pressure foot and rotate the  whole thing until it lines up where I need to sew. Then put the pressure foot back down.

Like so!

See the beak is finished and now we add the eye patch.

See how the pin is in the fabric. I will be able to sew two directions  and leave that pin in for most of it. Treat the eye patch like a box shape when you are sewing and it will be easier. There is a bunch of sew,stop, leave the needle down, lift the pressure foot, and turn to this part.

Now your Owl is finished except for his eyes. I sewed the eyes on at the very end of making the purse/bag.

Isn’t he cute. I know that the sewing purists in you would say. Where is the interfacing and the stabilizer? My thought is:  I made this for a teenager. In two months or less she will probably not be using it as she will want something else.  I can always make her another. If I wait until I have all of the things needed to sew, I would never sew. This isn’t rocket science or even an entry to the fair. It is a bag for my girl. i learn something every time I sew and I am getting better at it everyday.

talk to you later,

P.S. She loves it!

Karen