Posted on

Staying on Track: Use Your Stash Challenge 2017

Staying on Track

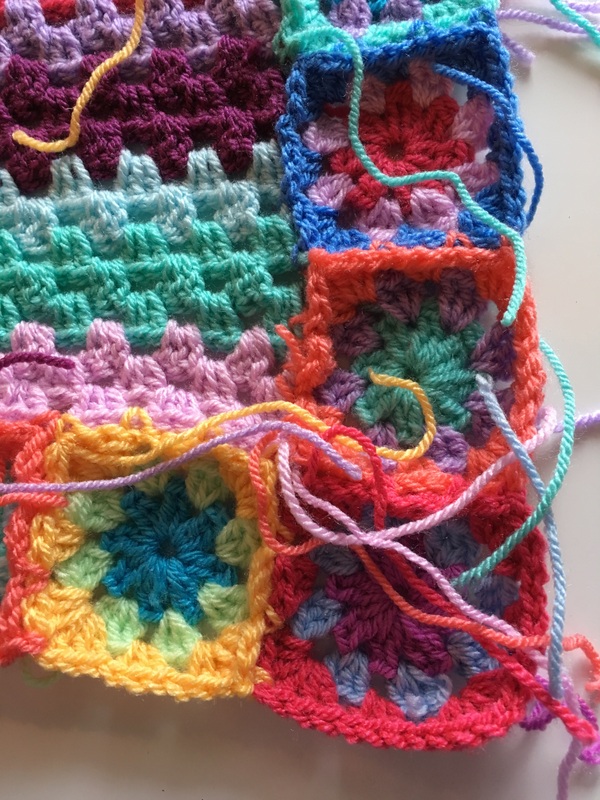
Another day, another project in the Use Your Stash Challenge 2017! This one I have been putting off for at least two years–maybe more, considering the baby I made the first one for is now four-years-old. This is such a beautiful baby blanket, I couldn’t resist starting another one–but that was years ago. If you’re like me and find that staying on track isn’t always easy, this post will be an encouragement to you.

Continue reading Staying on Track: Use Your Stash Challenge 2017

Posted on

Use Your Stash Challenge-2015 Numbers 8-13

It has been a really busy week, I have been working on the Use Your Stash Challenge-2015! I have gotten several projects done and I might even be out of the single digits.

#8 I have finished this scarf/shawl combo.Use Your Stash Challenge-2015#9 I made four of these for a friend. Since they used stash yarns I am counting them as one item.

Use Your Stash Challenge-2015

#10 This crib springs recycle to wall storage. I know it looks half finished but it is ready to hang and painted bronze.

Use Your Stash Challenge-2015#11 I finished this baby blanket. Use Your Stash Challenge-2015#12 I also sewed up about 20 cup cozies but I am only counting them as one. I have tons to sew that are already cut out. I am going to call a group of 20 cup cozies as one item for the challenge. I will get them all sewn that way and I won’t have them sitting around as WIPS. Here they are at the half way point.

Use Your Stash Challenge-2015

#13 I also sewed some child sized reversible superhero capes. These two are blue and silver. I have a ton more to sew and it is just a matter of time to sew and the willpower to see it through.

2015-01-19 16.48.22


This is what is next on my list of things to do.

  •  Baby bibs: 6 done, 2 in the photo and 1 in the mail and 3 others.

Use Your Stash Challenge-2015 Numbers 4-10

  •  Baby blankets ready to iron and do the top stitching: 3 sewn and complete, 1 left

Use Your Stash Challenge-2015 Numbers 4-10

  •  Finish quilting the striped quilt!
  •  Put the binding on the stripe quilt
  •  Cut out and sew  more super hero capes
  •  Sew cup cozies that take red thread
  •  Deconstruct some jeans so they are ready for cutting.
  •  Pack some orders
  • Clean the studio

I have some fun things planned this weekend and the weather is promising to be rainy. This is good, it will encourage me to get some serious sewing done. I have so much to do. I will need to get some more navy thread, but I can sew with other colors until I get a chance to pick some up.

This year the Use Your Stash Challenge seems to be more about finishing what I have started. I like it. It is encouraging me to actually complete some things that have been hanging around for ages. I hope I can keep up the momentum and my mojo for getting things done.  I have some custom orders that are in different stages of waiting so I must get back to work.

Talk to you later,

Karen


Posted on

Fabric Bin Tutorial

Today’s tutorial is brought to you by breakfast cereal! Really, I love to use these magazine holder style fabric bins to help me store and sort my fabric. If I put my fabric away in boxes I can’t see what I have and tend to buy more. Since I am trying to stay in my budget. I decided to store my fabric out in the open on shelves. so that I can actually see what I have. I am pretty visual and I need a constant reminder of what I have. The problem with shelves is that the fabric stacks get sloppy and tend to fall over.

Fabric Bin Tutorial

I needed to find a way to store my fabric that would keep it in sight and keep it neat. I have open shelves or I would have rolled all the fabric on little bolts. So I needed to find another way to store my fabric. I had an old magazine holder that I had cut from a larger cereal box and decided that I would try that. It works perfectly. Now I can see my fabric and keep it neater.  I can pull the whole bin down from the shelf. The sides keep the fabric from toppling over. It keeps the stacks of fabric neat and contained. I can also see what I have so I don’t over buy. Fat quarters fit perfectly into each bin or I can fold larger amounts of fabric smaller and file them away into these fabric bins.

We recently went through two of the large boxes of cereal from Sam’s. I am going to show you how I make these bins instead of buying them from the shop. I would rather spend my money on supplies rather than  craft organizers.

Tape the boxes shut with packing tape.

Fabric Bin Tutorial

Fabric Bin Tutorial

Measure down three inches from the each long end. You can see the brown mark I made.

Fabric Bin Tutorial


You can see both of the marks that I made above. Join them with a diagonal line between the two marks.

Fabric Bin Tutorial


Do the same on the back.

Fabric Bin Tutorial

Join the diagonal marks with a line straight across the edge of the box on both sides.

Fabric Bin Tutorial


Then cut on the line. You will end up with something that looks like a magazine holder when you are done.

Fabric Bin Tutorial

I ended up with 4 magazine holder style boxes. Now you can paint them, or cover them in craft paper or decoupage them with paper or fabric. Put them on your shelf and fill them with nicely folded fabric. Perfect fabric organizers for free or at least the cost of the cereal.

Fabric Bin Tutorial

Yes, these count for the Use Your Supplies Challenge- 2015

These are numbers 4,5,6,7!

Talk to you later,

Karen
Posted on

Pink is finished!! #3 in the Use Your Stash – 2015

I finished Pink (the crochet afghan) this weekend. I am so pleased with it. It looks so cuddly and warm. I found some lovely yarn at the shop. It was soft and washable. It is variegated with a long color change in the yarn. It was really similar to a Lion Brand wool yarn that I love to use. It is primarily pink and red and the colors called to me.

I started it in the Linen stitch but it turned out horribly stiff and thick. It looked lovely. Pink is finishedI was also having some problems seeing where to put the stitches. I may need new glasses. I have named this blanket Pink but you can see the other beautiful colors in the yarn. I love working with variegated yarn. You never have to change or sew in many ends. It makes a nice change from Granny Squares that change color every row.Pink is finished Pink is finished Pink is finished Pink is finished

I love the bobble border. It adds a little whimsy to the whole blanket. I added a nice gray border on either edge of the bobbles. It adds some definition to the edges. Pink is a bit larger afghan than I normally crochet. It is 51 x 62 inches long. The stripes run lengthwise. I think it will make a great Valentine’s Day gift to someone special. It is available in the ChocolateDogStudio shop!

I am also adding this to the Use Your Stash Challenge – 2015! This is #3 for me to have finished this week. It is a huge project and I spent a bunch of time on it. I am really pleased with the finished product. I just knew that yarn would make a beautiful blanket.

Talk to you later,

Karen


Posted on

Using My Fabric Stash item #2

I finally did it! I did some sewing. I actually sewed clothing. I never sew clothing but here it is. My Mother in Law had some incredible fabric stash. She sewed all of her life and after she became a Grandma she sewed incredible dresses for the girls. I am sure that this fabric was intended to become a beautiful hand smocked dress. The girls grew up too quickly and the stash was never used. . I know she was disappointed when the girls grew too big for the hand made treasures. I have quite of few of them saved back. I just couldn’t get rid of the beautiful hand made dress. The hours of work that she put into each dress is just overwhelming to think about. She poured out her love into these Sunday dresses for the girls.

Here is what I made. The instructions were weird and I would totally put it together another way. I think my middle school home ec teacher would give me a C on this project. It isn’t perfect but fits the bill.

fabric stash

I think it came out quite nice. There are things I would change about it but I am still pleased with results. It is a little too big which is so much easier to fix. Here are its humble beginnings.

fabric stash

Isn’t the fabric beautiful. I just love the blue and green floral design. It is a very lightweight cotton fabric. I love the fact that the fabric stash is getting so much smaller.

This is #2 out of 200 in the Use Your Stash Challenge- 2015. I am excited, things are getting finished and plans are being made for future items. I am a great procrastinator and I needed this little push to make me finish some things up. 200 items feels like a goal I will never meet. I keep reminding myself of all of the supplies I have stashed away in my studio under the eaves. I know I can come up with a bunch of small items. I just hope that they will be worth the time. If you are wondering what I am doing with trying to make 200 items out of my stash you can find the first blog post here.

It has been a busy week with our homeschool co-op, church and other obligations. Our youngest son is writing a blog and I am helping him with the little bit that I know. He is filming You-tube videos about building with legos. They are funny and quirky just like he is. They are g rated videos for kids and quirky enough for adults to enjoy. If you would like to watch his first couple of videos you can see them here: lego-of.me Send him a comment or two and let him know that you have stopped by. It is so encouraging to know that someone somewhere is reading what you write.

Talk to you later,

Karen


Posted on

Burlap Dry Erase board – Use Your Stash Challenge – 2015 #1

I have finished a couple of Use Your Stash projects and here is number: 1 a burlap dry erase board! Remember when I was washing burlap.  It looked like this in the washer. I washed it three times.

burlap dry erase board

The lint was incredible for all three loads. I thought that the amount of lint would decrease. It didn’t, I think the burlap bags were so old that they were disintegrating in the wash cycle.

burlap dry erase board

The bags did lose a lot of dust and dirt along with all the lint. I checked the lint trap twice during each load. I was scared that I was going to set the dryer on fired with all the extra lint.
I had seen great burlap dry erase boards on Pinterest. I like all the texture that burlap dry erase boards have. I had an old inspirational photo in a pretty nice frame that we have had for years. The photo had something to do with diligence or hard work or something like that. I took the poster out and added the burlap. I glued the burlap down around the edges with something rather like tacky glue. I pushed the staples back down to hold all the cardboard, burlap and glass in. Then I glued brown paper across the back like a framing store does. It keeps it looking neat on the back.Burlap dry erase boardYou can see the red and green stripes from the original burlap bag. So, this is my first stash project in the Use Your Stash – 2015. I am excited and it looks great! It didn’t cost a penny – if you don’t count all the energy used to wash and dry the burlap sacks. We will probably use this for messages, grocery lists, and reminders. It appears to be infinitely useful. It will probably hang in the laundry room. I am trying to get that room more organized and decorated.

talk to you later,

Karen

You can read my Use Your Stash Challenge – 2015 rules here.


Posted on

My Use Your Stash Rules – 2015

Here it is the day the Use Your Stash Challenge officially starts. I have been thinking about the rules for this year. I have also talked them over with Hubs. I love his point of view. Here is what he said in a nutshell

  • This isn’t a contest
  • You can make this what you want and need
  • have fun
  • don’t stress about the rules
  • There are no Use Your Stash police checking to see if you follow the same rules as everyone else.
Use Your Stash Challenge
https://www.etsy.com/listing/193537851/start-where-you-are-use-what-you-have-do

So here are my rules for the Use Your Stash Challenge. I hope that you come up with your own rules.

  1. Works in Progress count because they are stash and they are sitting around half done and taking up space.
  2. If I come up with a really cool idea but lack 1 essential element to finish it off perfectly. I will shop and buy that 1 thing. I will also document what I buy on the blog. Also if I get a custom order that needs supplies I will create that item.
  3. While I will show all the items I create, the good, the bad and the ugly, I might not count them all towards the final number.
  4. I will create 200 items this year for the challenge. I have about 50 items cut and awaiting sewing so it isn’t out of the question and these items do count toward the total.
  5. I will try to create 200 items 200 days.
Use Your Stash Challenge
https://www.etsy.com/listing/167670767/quote-wall-decal-by-andy-warhol-craft

I have stocked up on thread. I have found all my buttons. I have separated the scraps from the bigger pieces of fabric. I have signed up for a quilt class.  I have ideas since I have searched far and wide via pinterest and google. Here is the pinterest board that I have been pining ideas on since last year.  I also have a huge Crochet board and then also a sewing board.  I will start the board for us to pin our completed items on when I get my first item completed, feel free to contact me to be added to the board.

Join me in a this De-stashing challenge and clean out your space. Find the freedom of finishing up your Works in Progress! set your creativity free with this challenge that will force you to think in totally different directions. Limits force us to think outside the box and encourage us to use what we have or as our Grandma’s said

“Use it up, Wear it out, Make it do or Do without!”

Are we ready? Do you have tons of stash waiting the perfect project? Do you have a time frame in mind or an item list?

If you do then let’s get started!

talk to you after I get something created!


Karen