Remember my Pegboard and how bare it looked? Well, I created these cool hanging organizers that will help in the Use Your Stash Challenge. I thought you might like to see what I’ve done, in case you need a little inspiration for your own organizational needs.

I’m a visual person. Having things stored in hanging organizers (out in the open instead of in cabinets or drawers) keeps things in front of my eyes. Seeing what’s available to use gives me inspiration, and helps me stay on track for using up my stash.
The following is just a quick tutorial keeping with the theme of using your stash.
Clear Vinyl Zippered Bags
Whenever I buy curtains, or blankets, or something that comes in a clear vinyl zippered bag, I save the bags. You just never know when they may come in handy! I had three of these bags.

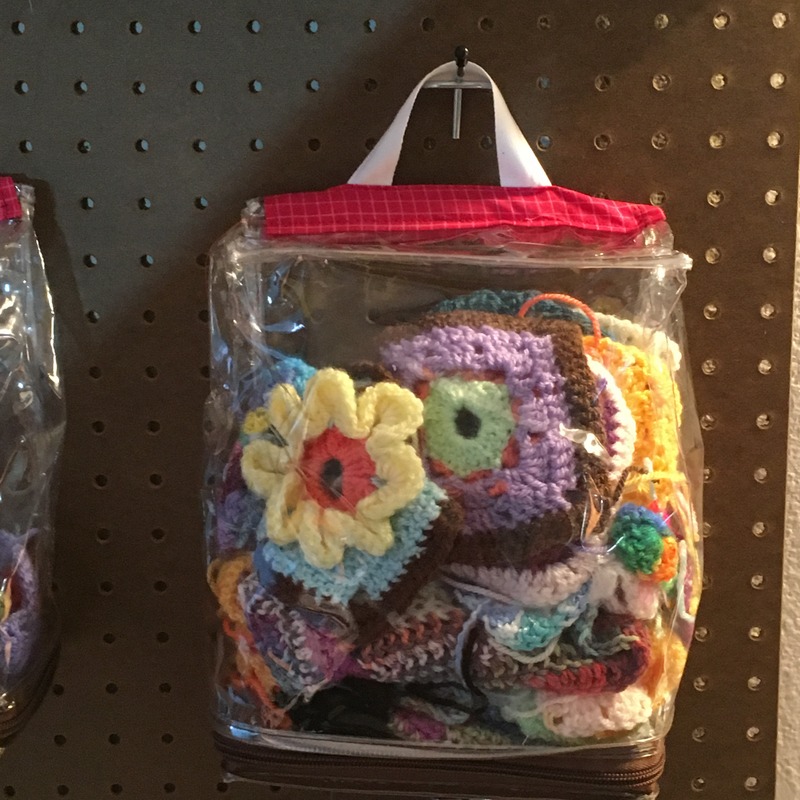
As you can see, they are great for storing things. However, they were frustrating because I couldn’t hang them up! So, I used a little ingenuity–and spare material–and found a way to create hanging organizers out of them. Now they hang nicely on my peg board.

Three Things You Need to Know
- Sewing on vinyl is not for the faint of heart. It is really difficult to do.
- I was not out for perfection.
- I only used things I had on hand and had about 30 minutes to create them.
Instructions
Supplies and Directions:
- Twill tape, 6-inches per bag (fig. 1)

fig. 1

- Leftover quilt binding or wide double fold bias tape (fig. 2)

figure 2

Prepare the quilt binding by sewing the raw edges in on each end (see photo above). Use the largest straight stitch that your machine will sew.
- Scotch tape for your sewing machine foot.
- A very fine sewing machine needle.
Place the scotch tape across the bottom of your sewing machine presser foot to keep it from sticking to the vinyl.

I sewed the pink binding to the bottom of the vinyl bag because the zipper was on three sides and I didn’t want to risk messing up how it closed.
Flatten the bag out as much as possible and finger-crease the edge you will sew over.

Did I mention I was in a hurry? I didn’t even change the bobbin thread!
Be prepared: the vinyl and the binding will walk in different directions. You may have to take out your first try and do it again. Take your time and try to get it right the first time. You want to avoid putting too many holes in the vinyl as it will have the tendency to rip like perforated paper.
Measure and pin the twill tape in place at the top edge of the binding, then sew it down. Be sure to backstitch to help it stay in place better.
Hanging Organizers
Here are the finished products!


I like them! They are infinitely useful and the cost was only my time–which was minimal since I didn’t obsess about them being perfect.
I meant to do more with my peg board, but time ran away from me, so nothing more has been accomplished. Yet! (Keep watching this blog for more updates on how I utilize my pegboard!)
Another Way to Organize Yarn
I received a yarn ball roller for Christmas. It is, quite simply, my favorite gift! It does a great job of winding the yarn into yarn cakes. Little by little, my yarn stash is getting more organized.

Aren’t those neat and tidy?!
Then I found this cool cabinet at my neighborhood craft store.

I couldn’t resist color coding all those neat little yarn cakes! The only way it could possibly be better is if it also had brown, black, gray and white drawers! Since it didn’t, I fit them into the very top drawer. I just can’t wait to get started using my stash!
I wish I could say I managed to get everything cleaned up, but I haven’t–there is so much to do!
Use Your Stash Challenge
I am having fun cleaning up the studio and getting ready for the big Use Your Stash Challenge that starts on January 15. Cleaning up the studio and finishing projects is one of my favorite things to do–because then I get to start new projects and buy new yarn! I am so excited to see where 2017 takes me!

Sign up for the newsletter to be part of the Use Your Stash Challenge:
[mc4wp_form]
Talk to you later,
Karen