Posted on

Introducing the Cotton Stripe Pillow

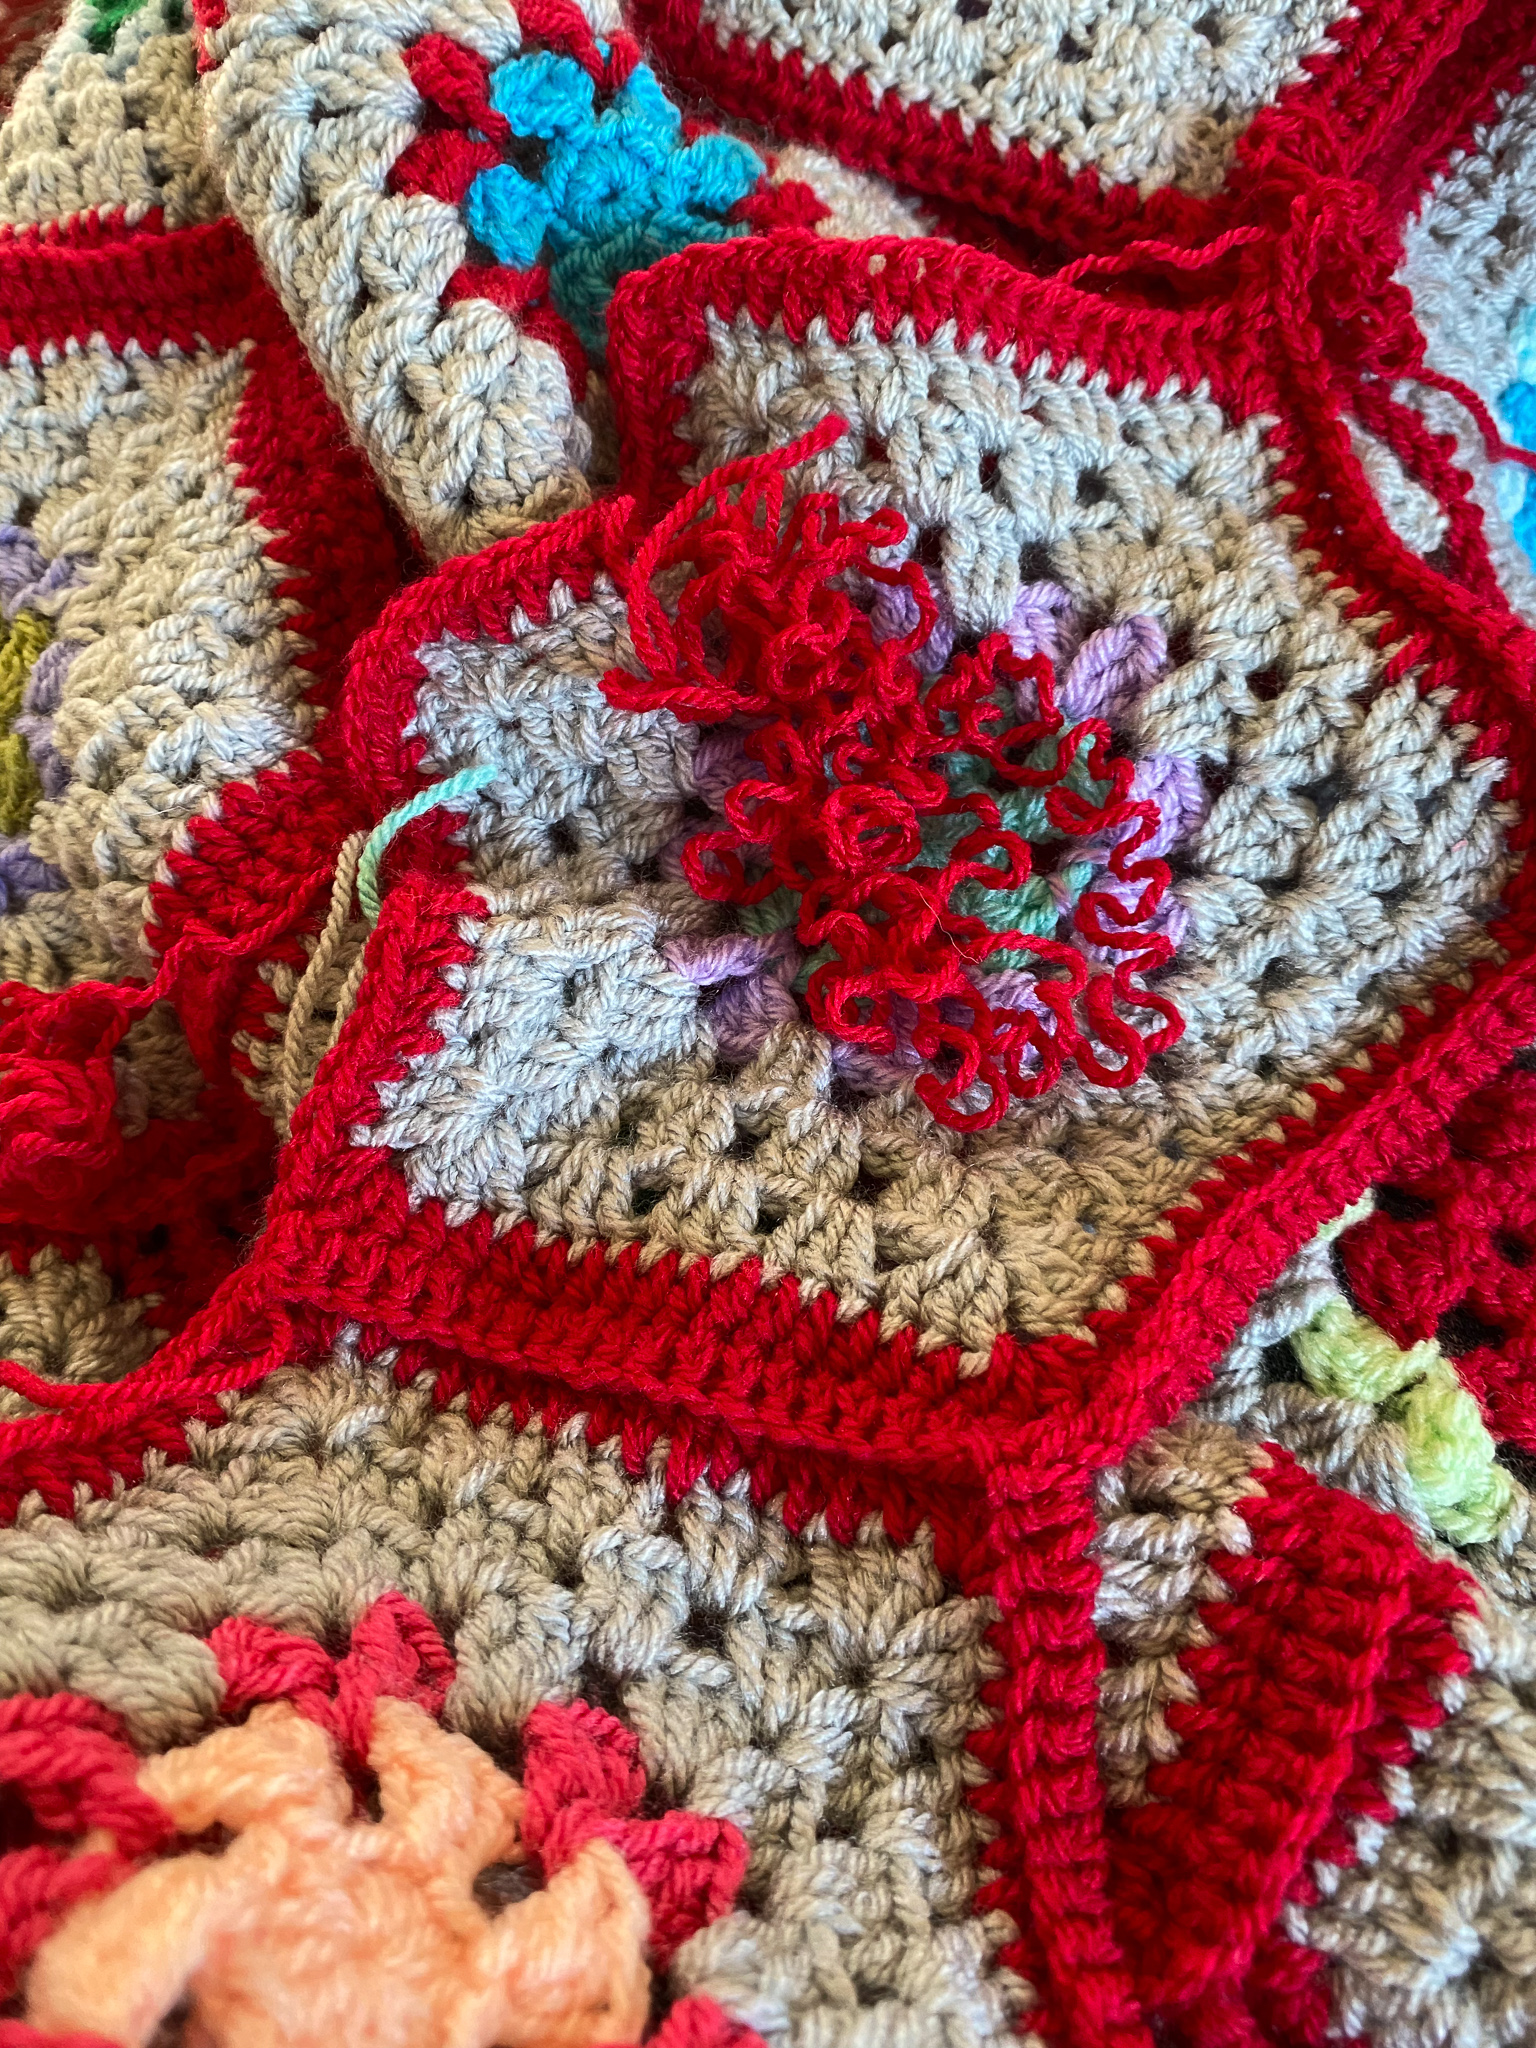
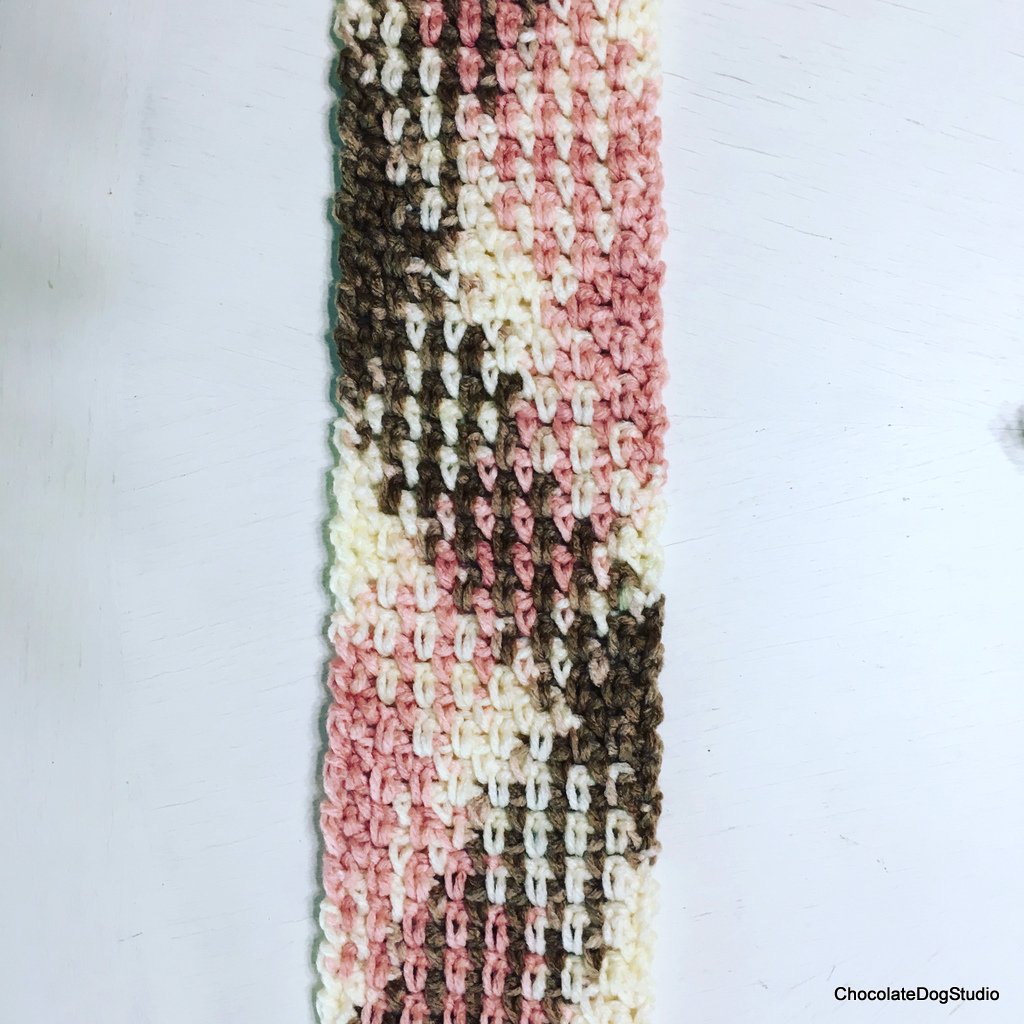
It’s about time for you to see the newest Chocolate Dog Studio crochet pattern: The Cotton Stripe Pillow. It finally took a respite time and incredible boredom for the next pattern to be born. No one said pattern writing was easy, but this is an incredibly easy pillow cover to crochet. There aren’t any fancy stitches or counting that you have to do after the foundation chain. Binge watch your favorite show and create this beautiful home accent.

Cotton Stripe Pillow
A beautiful home accent created with cotton yarn left from the cotton waves baby blanket.

The Cotton Stripe Pillow Pattern Release

The Cotton Stripe Pillow release happens today! Today is your day as I will refund the first five buyers of The Cotton Stripe Pillow pattern if you send me any Etsy message or leave the message at the end of the purchase receipt. This offer does have a time limit of the next five days, 9/16/2022 – 9/21/2022.

You can find the cotton stripe pillow in my Etsy shop. You can shop Here.

There is another new pattern coming out next week. The White Serape Stripe. I can’t wait it is a fun calmer version of The Serape Stripe which you can see here. It has taken even longer for this pattern to come to the shop.

Painting

Painting has been happening nearly every day. It is such a relaxing thing for me to do with no calls or preconceived ideas. I am just wandering where ever my brush takes me. Painting and crochet don’t seem to be good partners so it’s either one or the other these days.

As you can see a wide variety of art projects from drawing to abstract painting with a little mixed media also. Mixed media seems to be the biggest area of art these days.

Life

If you don’t like reading about life and how things are going feel free to skip this part. We are working on what we call the kids bathroom. Others would call it the hall bath except we really don’t have a hall or at least it’s really short. It is reaching a logical stopping point. Which we did in this case. At least we need to call in someone that knows more to give us advice.

I was remembering back this week about a story from a friend’s social media post about weird things that have happened with animals. We have had a number of weird things but this one is funny to me even now.

We were living in a new house and the living room felt really empty as Hubs was working late and abnormally quiet and all four kids under 9 were in bed. I was alone after a really long day unpacking. Have you ever noticed how noisy a quiet house can be.

I was sitting and enjoying the quiet, listening to the night noises when I hear a thump on the back of the recliner. I could feel it too, I listened and didn’t hear anything else. Did I imagine it?

Just as my heart was returning to normal it happened again.

The thumps were un-nerving.

I wait and just as I decide it was my imagination when it happens twice this time, THUMP, Thump.

I gather my wits and courage, give myself a stern talking to about how the sound was just my imagination and I peek around the edge of the chair, because I am too scared stand up – there it is a little green tree frog.

Whew, I was so relieved….. Just a little frog. We did the catch and release into the back yard.

Why do our minds always run off to the scariest thing We can think of? Surely I am not the only one has weird things happen.

Talk to you later,

Karen Marie

Posted on

Crochet Round-up

It’s been several years since I wrote and posted here. Here is a quick crochet round up of what has been happening in the studio.

Crochet

The crochet studio is under a buying ban in an attempt to reduce my quite sizeable yarn stash. It’s been quite unorganized as I put it all in storage as drawing become more important.

Four crochet blankets, three crochet striped pillows, and five crochet tote bags in the past 9 months seems a like a huge amount of work. There has been no pattern writing, though there have been plenty of rough drafts written. Two of the crochet blankets were WIPs (works in progress that have been finished, finally!

Thanks for your patience,

Talk to you later,

Karen

Posted on

Make that Blanket Bigger

Learn how to make that blanket bigger. I have been getting several people asking how to make different patterns bigger. This is a great skill to have as there are so many beautiful striped baby blankets that we wish we could increase. Here is your chance to take charge of this process.

There are a few things that you need that aren’t on the usual crocheting supply list.

Supplies

  • The first is a postal or food scale that weighs in grams.
How to Crochet that Blanket Bigger : this is a photo of my postal scale
  • A yarn label for the yarn you will be using to crochet the afghan. (Almost all yarn is measured in grams.) Stylecraft Special DK has 100 grams per skein.
  • A calculator for figuring the math part along with a pencil and paper. I use my afghan planner book that I made out of a composition book. You should use the worksheet.
  • The yarn that matches the yarn you will be using. (I will be using some stash Stylecraft Special DK for this purpose.)
  • A crochet hook of the correct size for your project.
  • Scissors
  • The Free PDF worksheet

Weigh the Yarn

Start by crocheting the foundation chain to the desired length in the yarn weight you will use for the crochet blanket. Then crochet the first set of color rows on the chain.

Ie: If you are creating a baby version of a granny stripe then crochet a length of chain about 36″ long. Crochet the first two rows, tie off and cut your yarn.

How to Crochet that Blanket Bigger: This is a photo of my bowl on the postal scale with the weight zeroed out.

( I apologize for how yucky and old my postal scale looks. )

Then you put a bowl on your postal scale and turn it on. It should zero out the weight of the bowl, in other words it is ignoring the weight of your bowl and will just weigh your crocheting. Add your crocheted strip to the bowl. Write down the weight of the 2 rows.

There are two rows of green in this afghan pattern.

Check the Width

You will need to decide how wide to create that crochet blanket. Read the pattern you are adapting and see what the measurements are. Most smaller blankets do not have the width to proportionally carry the width. Baby blankets run about 36″ wide and many adult blankets or throws vary from 45-60 inches wide depending how large you will creat the blanket.

There will need to be some rows added to the width. How are you going to do that. The crochet blanket above has a mirror effect from the center green stripe.

The beautiful cotton waves baby blanket stretched out flat showing the beautiful striping
Yikes, Stripes! Afghan 2

The blankets above have a varied striping sequence and you could simply repeat the first striping sequences again until the blanket is the right size.

Make that Blanket BIgger

The Sunshine and Shadows afghan would require you to add rows in the middle sections of color. It might be as simple and crocheting each row twice which would double the size or only crochet the vibrant middle sections twice which would increase it a smaller amount. Whichever you choose to do be sure to add these rows to your stitch count as you prepare the worksheet.

Count the Rows

Count how many rows are in the blanket using each color. You can use the gauge to figure out how many rows there will be in the width that you want the blanket to be.

Using the yarn label take the weight of the yarn and divide it by the weight of the completed row of color. This will tell you the approximate number of color rows you can crochet using each skein. Next do the math for each color and figure out how many skeins you will need for the blanket.

Don’t forget to figure in yarn for the border while you are figuring out the yarn. Add the border rows to the stripe you crocheted earlier and see what it weighs in grams. Then multiply the weight by 4 to see how many skeins you will need. If there are multiple colors in the border rows simply weight before you add the next color and makes notes of the weights.

Check Your Math

(Note: If there are different stitches in it, crochet and weight each stitch row. Every stitch style uses a different amount of yarn which gives you a different weight of yarn.

  • Use the same yarn to do your figuring as the pattern you will be crocheting.
  • Be sure to check your gauge and make sure that you are crocheting at your usual tension.

Believe me, knowledge is valuable and think how free you are now! You can increase the size of any striped afghan from ripples to simple granny stripes easily using this method.

New Crochet Blankets in the Works

The brown scrap blanket
A new baby blanket for the shop

Talk to you later,

Karen

Posted on

Christmas Chains, Yarn and Crochet

Christmas chains, yarn and crochet; there isn’t much painting this week. The studio is full of soft goods right now, quilts for small grandkids, yarn from Black Friday shopping, products to ship and projects to finish. Are you ready for a small breather in your hectic schedule? I know that we are. Some time off doing what we love, maybe a little home repair, a little deep cleaning, a ton of family time, church time and time to reflect. Like you, we live a rather normal life; well, as normal as it can get. Family time has been a little more intense the past several months. It is good to see that some crochet is starting to happen again. It fills a deep need to create and is more portable than painting and it keeps me balanced.

Yarn Shopping

This post contains affiliate links

Crochet has been filling my time more since Black Friday shopping. My crochet momentum is back, finally! The family knew when the soft squishy packages started arriving that Black Friday shopping had been a serious occupation for the Studio. Good thing that some of these projects have used up a little of the yarn. Hopefully, the projects planned for the yarn will work up quickly and fill the Etsy shop. A few photos of the beautiful colors soon to be coming your way with new patterns (hopefully) or remakes of older patterns in new colors.

Christmas Chains


Christmas Chains

Crochet

Here is a little of what I have been working on these days.

Christmas Chains

The Baby Hexi which seemed to take all summer.

Christmas Chains

A new take on the Ruby Red with Lion Brand Landscapes “Twilight” (Amazon link) just to give folks another viewpoint of the Ruby Red in colors other than pink/red.

I also worked on a cute crocheted paper chain style garland for the Christmas tree. Super simple to crochet. I used all of the silvery yarn on hand and created two separate chains. The instructions are included below.  Here they are in process. These chains were fairly quick and I crocheted a bunch in one color and then joined them with the other color. Super fast and easy, great for beginners or children for learning to crochet. Also great for using up small bits of scrap yarn!

Here they are on the tree.


A few more more links will be added when there is a little more time. They were crocheted out of silvery grey and red Stylecraft Special DK but they would be beautiful out of bright cotton yarns or all white, even tropical colors would be beautiful. Crochet them any color and it will still add a fun look to your Christmas tree.

Christmas Chains Garland Pattern

Supplies

  • DK weight yarn in Red and silvery grey,
  • Size G crochet hook
  • Scissors
  • Large eye needle for sewing links.

Link:

Chain 25,

First row: HDC in the third chain from hook and HDC across the chain, keeping the chain untwisted.

Second row: chain 2 HDC in each stitch across the the previous row. Tie off and cut with a long tail.

Sew one end to the other using whip stitch.

Finished one chain. Continue creating links being sure when sewing to link the chains together to create a Christmas Garland.

Merry Christmas!

Merry Christmas, Happy Holidays and Happy New Year everyone. All online shops are open this year for the next several  weeks. We have family visiting and hubs in off work for weeks between December 17 and January 1st. Should you need any help on any crocheting or orders, please bear this in mind. I will be stopping by to check on things but not as often. The last day to order from Etsy and Amazon for Christmas delivery is Tuesday Dec. 11th.

Merry Christmas and Talk to you later,

Karen

Posted on

Life

Life

Life keeps happening  here. Do you ever feel that your life is one frustration after or another or that the frustrations are all stacked up like so many building blocks? Life has been rather that way here in Oklahoma. Looking out the studio window has been really rare these days. First one thing and then another pulling me away from what “I think” is more important-only to find out it isn’t that important after all.

The continuing saga of the water leak is over. The last little bits done have been done for several weeks now and they don’t seem like that big a deal.  Which is good! We have another construction issue starting this week.

Learning Applied

There have been some learning experiences from all the construction taking place in the house. Painters- have you ever seen professionals at work preparing to do their job. Here is what I am learning from their work and why I am even telling you about all the work we have had done.

  • Clear out the old
  • Plan
  • Prepare for the work
  • Make sure you have the right tools
  • Lay the groundwork or frame work to the best of your ability
  • Be careful and neat while you are working
  • Finish the job
  • Clean up and put your tools away when you are done.

This seems to be a lesson I learn over and over. I tend to dash in and get started without counting the cost, having the yarn or finishing other projects first. This creates a huge backlog of projects in my WIP stack and projects get forgotten.

Life

How to Crochet like a Professional

If we apply all the lessons listed above we can come up with a short list of how to apply this to crocheting.

  1. Clean your yarn bags and baskets out of the old work and yarn from previous projects first
  2. Plan your work, play with the color pegs or yarn to find good color combinations or determine your color range.
  3. Write down or photograph the combinations you want to use.
  4. Practice any new stitches until you are more confident.
  5. Gather all of the tools you need and put them all together in your project bag.
  6. Read through the instructions at least twice to make sure that you have everything.
  7. Check your gauge and crochet
  8. Weave in your stitches as you go. It does make it less tedious at the end and makes it easier to work.
  9. Finish your work completely.  Ask for any help you need before you reach the point of no return on the frustration.
  10. Clean up your tools when you are finished working.

Life

When you take a break in the middle make notes on  the pattern where to begin next if the work is complex,  or at least finish the row or color you are using before you set it aside. Tie off any ends firmly if the color is done so you can continue work later. Tie it off loosely or use a stitch marker (or safety pin) so it doesn’t get frogged if someone picks up your work to Ooh and Ahh over. (Forgive them, they just don’t know any better.) 

Crochet

Crochet HAS been happening here in the studio, though I have spent a ton of computer time the past few months getting things set up. Though I have to admit that it hasn’t been at the top of the list. There has been a ton of painting happening. While I love crochet sometimes I need a vacation from it and we lost the remote to the television for a week or two. Living a healthier lifestyle has also been a huge contributing factor.

Painting

Painting has been happening and it is going extremely well.  Here are a few photos of finished projects.

LIfe

LIfe

The armchair is for sale at an art store in town and the stool has already made a customer very happy.

Talk to you later,

Karen

Posted on

Crochet Planning Worksheets

The past several weeks have passed in a blur of activity. I really feel this Lord of the Rings meme is accurate because I want to say…

LOTR meme

This is really how I usually feel around this time of year. Christmas is looming, and those of us who have small retail businesses are run right off our feet.

Thanksgiving means family gatherings and creating good food–tons of good food. The past four years have seen an influx of people to my home as my brother and his family come down to visit, and my college-age daughter’s friends come to stay for the weekend (they are too far away to go home for the weekend). Toss in Black Friday, managing an Etsy shop with after-Thanksgiving sales, cold weather, house cleaning, and cooking for everyone and life just gets really busy and really interesting.

Who am I kidding? It’s not just me — we are all run off our feet with time commitments: school, church, family, friends, decorating, grocery shopping, gift buying. I have to work hard at staying organized; I have forgotten about people during Christmas: family, small children in my home, {gasp!} my dear daughter. It was awful! I stayed up until after 3 AM sewing and beading a small denim dress for her “Santa gift” and scrounging through my stash of cool mini-gifts that I kept at the time. I decided then-and-there that I will never again forget anyone — and then I did it again. Twice. So now I work really hard to make lists, and I make sure my family sends me emails with their gift lists.

This year is no different. I am procrastinating instead of getting the housework  (or anything) done. Instead, I’m thinking of post-Thanksgiving when I will get to sit around and crochet. I’m also thinking about how some of you may be just like me. So, I created a couple of organizers to help you keep your crochet organized. These worksheets are my Christmas gift to you. They are yours free when you join my email list. If you are already a member don’t worry about it, they are coming to you in the next newsletter!

Crochet Planning Worksheets for you

The first one helps you figure out if you have enough yarn in your stash for your next project. The second one helps you create a shopping list for what you still need to buy after shopping your stash.

I finally put down on paper what I do when I plan an afghan using my stash yarn! I wish I had started doing this years ago. This worksheet will be an incredible help as you plan out your future projects.

Talk to you later,

Karen


Posted on

New to Crochet: Picking Colors for a Project

Picking colors should not scare you.

Many beginning crocheters lack confidence about picking colors for their projects. The time-honored and traditional method that they often use: start with their favorite colors.

Picking Colors

What is an easy way to pick colors for an afghan? How can you know if the colors go well together? This video is a simple answer to these questions. and it will walk you through the process of picking colors for a project.

Color Theory

I hope this video helped you understand about which colors are more likely to go together. When you are new to crochet, it can be difficult to pick good color schemes. When you find a pattern you like but want to try different colors, you may need to crochet, take it out and pick new colors, crochet again, take it out and pick new colors, crochet and take it out again… until you reach something that resembles the color scheme you envisioned in the first place.

Color theory can be extremely complicated; this is just a quick refresher course. When in doubt, ask a friend or even the sales clerk at the yarn store for their opinion on your color choices.

What I’ve Been Up To

Remember that argyle swatch I made a few weeks ago? I am determined to make it bigger. I’ve enlisted the math lover at our house to help with the figuring. Although I’m pretty good at eye-balling it, it helps to get some math involved. So, I’m off to crochet more color pooling swatches today!

What about you? I’d love to know what you’re up to today. Start a conversation by leaving a comment!

Talk to you later,

Karen

PS: The November Pattern Giveaway is coming up fast, so keep checking back! Better yet, sign up for our newsletter and get notified whenever new posts are up! (On a computer, scroll to the top of the left column to sign up. On a mobile device or tablet, scroll down to below the comments to sign up.)


Posted on

Beautiful Ruby Red Afghan Pattern

I have just listed my Ruby Red Afghan pattern for sale in my Etsy and Craftsy stores. I have included the supplies and skills list you need to be able to complete it. This afghan pattern is a step up for beginners. The yarn is a lovely wool blend but can be difficult to frog (or take out) as the fibers can mat together. Even with that challenge, it is a beautiful, soft and warm blanket. It is a good “first jump” into specialty yarns.

Ruby Red Afghan Pattern, www.chocolatedogstudio

Ruby Red Afghan Pattern, www.chocolatedogstudio

Ruby Red Afghan Pattern, www.chocolatedogstudio

Ruby Red Afghan Pattern, www.chocolatedogstudio

Ruby Red Afghan Pattern

It is crocheted and photographed in this lovely red yarn but you can choose from any of the yarn colors which this yarn comes in to make yours unique. There are so many different choices; from icy blues and greens to purples and yellows. Just…so many choices! I know you will find the perfect color combination to fit your personality.

Ruby Red Afghan Pattern, www.chocolatedogstudio

Warm, soft and wooly, it makes a great lightweight blanket with all the warmth of wool. The yarn for this blanket is usually easy to find.

What I’ve Been Up To

October seems to be when I gear up for Christmas and begin creating any handmade gifts that I might want to give to bless friends and family. This blanket is a wonderful gift to give or receive. Spare time is always at a premium during these months and this year is no exception. My goal is to get some new patterns up in the shops soon, so keep dropping in (at the Etsy store and Craftsy store) to look around. (And don’t forget to sign up for the newsletter! Doing so will keep you up-to-date on patterns, finished products, and all that I’ve been up to in life.) I am also concentrating on my giveaway for November. I can’t wait to tell you all about it!

Talk to you later,

Karen

Posted on

A Reason to Rip Out: Color Pooling

Family and friends often ask me what it’s like to design crochet patterns. Recently, I answered that I crochet and rip it out, crochet and rip it out, crochet some more and rip that out, too. I have just finished trying a new technique called color pooling.  Finally, I finish the prototype and let it sit for awhile. Eventually, I take it apart all the way down to the beginning. I can almost hear you sigh as you ask, “Why are you telling me this, Karen?” The answer is simple: learning a new technique means that you must be willing to rip out old work.

I get it–I really do–that feeling of ahh, it’s finally finished! That sense of permanence and finality that comes when you put the hook away, clean up the snippets from weaving in all those pesky ends, and fold up your creation and set it aside. I love that feeling of accomplishment.

The Need to Rip Out

However, there are times when that project just isn’t working out; the colors, the size, the density–something just isn’t right. In your heart of hearts, you know that you are going to hate working on the project and that it will sit unfinished if you don’t correct the problem. You are hesitant–you’ve already put in so much hard work–but you know what you should do. You should rip out that row, those 25 rows, down to the beginning and start over, and simply give the yarn away and start over fresh!

A Reason to Rip Out

I’m talking about the need to rip out in order to prepare you for the next wonderful thing in the world of crochet. It’s big! It’s addicting! And it will cause you to rip out as you work (or design) patterns!

You’ve seen those beautiful variegated yarns on the shelves, the ones that have 2-5 different colors in them, with each color about 10-25 inches in length.  There is this Wow! thing you can do with it, if you space things just so, and crochet the yarn with just the right tension. I know you’ve probably seen projects that use this technique, and you’re wondering about this addicting craze. And, IT IS addicting–In the biggest sense of the word! But, you must get used to ripping out because you will crochet and rip out and crochet and rip out, over and over, again and again.

Color Pooling

I started last night with some Loops & Threads® Impeccable yarn from my neighborhood craft store and my favorite G-size hook. It worked perfectly! I crocheted, ripped out, and crocheted again; in between, I surfed the Internet for clearer instructions. I worked all evening and finally ended up with what you see in the photo below. This is about 34 stitches wide, plus two for turning.  color pooling

What is this mystery? Where did the argyle come from? This, my crochet friends, is called color pooling. Color pooling is when you crochet with variegated yarn in the correct length, tension, and stitch to make the colors show up where and when you want them. It isn’t hard, but it does take determination (and a certain amount of bull-headedness) to want to crochet something in rows for about 3 inches before you rip out and start over to get the patterning right. This method of crocheting isn’t for the faint of heart.

Playing with Color

I love it! What a great way to play with color and buy lovely yarn that already has the pattern built right in! There are so many variegated yarns to choose from, too. Some have larger color sections than others, so keep that in mind when you are shopping.

I will show you more in a later post, as I am off to play with the yarn and see if I can’t make it wider. What did I do with the 18 inches of skinny, skinny scarf, you ask? I ripped it out to make a wider one (after the photographs, of course)! So far, it isn’t working, but I will figure it out. I’m not quite sure whether it is the tension, number of stitches, or what.

Remember: crochet, rip out, repeat.

(I’m hooked! This is like Sudoku, or spider solitaire with four suits. I just can’t put it down, and I will win in the end! As you can see below, it’s time to rip out again.)

time to rip out

Talk to you later,

Karen

Posted on

Sell Your Handmades

Are you thinking about ways to sell your handmades now that you have 100 crochet dishcloths whipped up, and you’ve already given two to everyone you know? Are you thinking about possibly starting an Etsy shop?

There are options other than Etsy or craft shows for selling your handcrafted items which work easier and more efficiently.

Deciding to Sell Your Handmades

When I decided to start selling my handmades, I opened an Etsy shop. My husband was in the process of changing jobs, and I thought selling handmades would be a good way to supplement our income. I designed a cup cozy and started creating a bunch out of stash fabric– I simply used whatever supplies I had on hand as a way to make a profit.

My first year was dismal as far as sales; I didn’t sell a single thing. However, keep in mind that:

  1. The shop opened in November
  2. I had five items
  3. I had no idea what I was doing

Unfortunately, the next year wasn’t much better.  I made $79.50 for the whole year! I will admit that:

  1. My photos were AWFUL! Just horrible.
  2. My listings weren’t much better
  3. My promoting was just BAD

An income of $79.50 for the year is not going to pay my bills. I had to either get better or quit. I chose to get better, and I slowly improved over time.

Consider All Your Alternatives

When I started selling on Etsy in 2008, there weren’t as many other online sales venues. Etsy wasn’t nearly as big as it is now, and it was mostly Mom and Pop shops (not individual sellers). Pinterest and Instagram were just ideas in someone’s head at the time, and selling on Facebook and Twitter was almost non-existent.

As you consider today’s options for ways to sell your handmades, ask yourself these important questions:

  1. Is it worth the cost to pay Etsy 3% of every sale you make?
  2. Do you want to be one of the 1.6 million sellers on Etsy?
  3. Why give Etsy any of your hard earned money when you can use other venues for free?

Sell Your Handmades, www.chocolatedogstudio.com

If you are set on selling your handmades online, either on Etsy or another venue, then it’s time to start thinking of some basic business decisions, such as:

  1. Imagine the worse case scenarios when it comes to buying/selling online and figure out how you will handle each of them. Write your answers out and keep them somewhere safe so you will have them if you run into any of the scenarios.
  2. What will your return policy be? Make sure you put this in writing. You will need it at some point.
  3. Wrap an item for shipping and weigh it. Put this info in writing for easy reference.
  4. Research shipping costs and decide how you will handle long distance returns. (See #2.)
  5. Figure out average shipping costs to various locations in the USA so you can set your shipping prices accordingly. Do you want to ship to Alaska and Hawaii as well? What about other countries? (If not, include this info in your shipping policies.)
  6. Think about custom orders. Are you going to accept them? Will there be special charges for them?

Keep all this info in a safe place. This is part of your business plan. As you make more business decisions (such as how to market your handmades), you will want to keep all of this info together in a place where you can find it easily.

Sell Your Handmades, www.chocolatedogstudio.com

Creating a Business

If, after answering all these questions, you still desire to sell your handmades, then it’s time to get serious– get some business cards made. Business cards are a great way to create a business identity. Tuck one or two into each and every item you sell, hand them out to friends and give one to anyone you speak with who asks for your contact info (doctors, sales clerks, local craft shops, etc). Include a photo of an item that represents your business on the front of the card to boost your identity as a serious business owner.

Take good care of your printer, or buy a sturdy one. It will become a good friend to you as you print out receipts, business cards, invoices, and shipping labels.

Make sure you set up your finances correctly, too:

  1. Write a budget. (And stick to it!)
  2. Open a business checking account. (Never mix business and personal funds.)
  3. Keep track of your expenses. (For tax purposes.)
  4. Get a sales tax permit for your state if you sell to your local friends. (The IRS will find you sooner or later if you don’t.)
  5. Stay out of debt. (If you don’t have funds in your account then don’t buy anything–it’s not a good deal if you don’t have the cash.)

My final piece of advice when you are ready to sell your handmades is simple: have fun, be enthusiastic, and don’t worry. If you take care to make quality items and treat your customers and other sellers well, you will succeed. You may need to make adjustments here and there, but everyone (from Wal-mart on down to the neighbor’s garage sale) does that.

Have you started to sell your handmades yet? Are you still thinking about it? Which social media or other venue have you found to be the most profitable? Leave a comment and let me know!

Talk to you later,

Karen