Keep going! Keep striving! Don’t give up!
How are you doing? Making any progress?
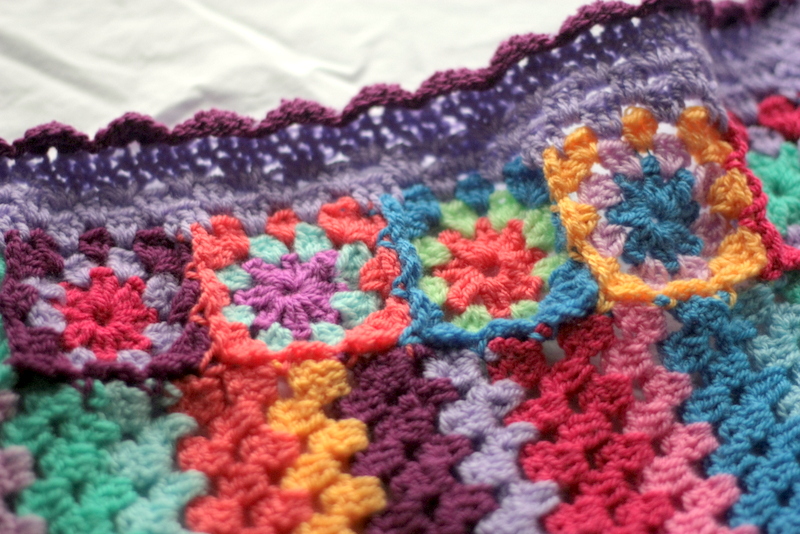
Look at all the beautiful things finished by the Use Your Stash 2017 Challengers!
Keep going! Keep striving! Don’t give up!
How are you doing? Making any progress?
Look at all the beautiful things finished by the Use Your Stash 2017 Challengers!
Another day, another project in the Use Your Stash Challenge 2017! This one I have been putting off for at least two years–maybe more, considering the baby I made the first one for is now four-years-old. This is such a beautiful baby blanket, I couldn’t resist starting another one–but that was years ago. If you’re like me and find that staying on track isn’t always easy, this post will be an encouragement to you.
Continue reading Staying on Track: Use Your Stash Challenge 2017
You and I are eyewitnesses to the huge backlog of WIP’s and stash yarns. The enormous challenge sits right there, in front of us, taunting. The last remaining step as we get started is to create a “2017 Work Line-Up,” a step-by-step list of our work in the order of completion. As I said in an earlier post, I am working on the project which can be finished the quickest–this will give me some encouragement right from the start. It is also the biggest project, the one that I utterly dislike the most.
This is a scary post for me to write: It is full of UnFinished Objects and Works-In-Progress and plain old skeins of yarn. It seems as if all the stashed yarn around my home is multiplying! Have you ever read the children’s book, Millions of Cats, by Wanda Gag? If you substitute the word yarns for cats, that’s about what I’m feeling these days! (Please tell me I’m not alone!) But, I’m going to do it. I need to wrap my head around all the UFO’s and WIP’s and skeins of yarn that are stashed around my home. The Use Your Stash Challenge starts in a few days, and I need to get a final count of stashed yarns.
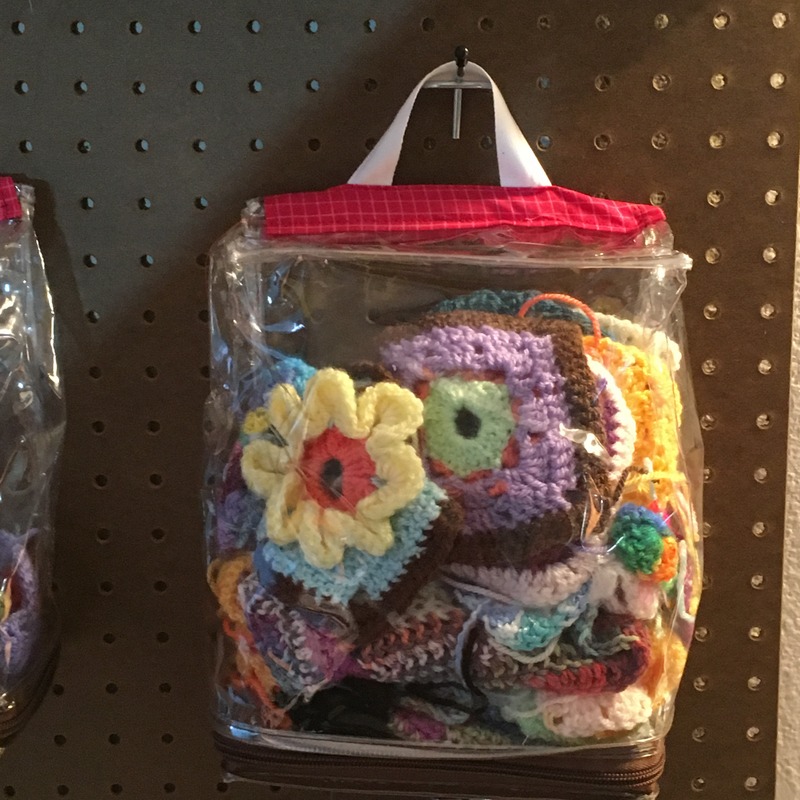
Remember my Pegboard and how bare it looked? Well, I created these cool hanging organizers that will help in the Use Your Stash Challenge. I thought you might like to see what I’ve done, in case you need a little inspiration for your own organizational needs.

I’m a visual person. Having things stored in hanging organizers (out in the open instead of in cabinets or drawers) keeps things in front of my eyes. Seeing what’s available to use gives me inspiration, and helps me stay on track for using up my stash.
The following is just a quick tutorial keeping with the theme of using your stash.
Continue reading Creating Hanging Organizers for Your Craft Area
Is it time to get out of your comfort zone? Are you setting goals for the New Year? I am. Stepping out of my personal box has been on my mind almost constantly these days.
Last month, Hubs and I spent time (together) out of our comfort zones. It was a business conference (which was out of my comfort zone) for women. Yes, Hubs was definitely out of his comfort zone, but he wasn’t alone. When we pulled into the parking lot, another couple was getting out of their car. The man looked at Hubs and said, “I’m so glad to see you! I’m glad I’m not the only one.” There was instant brotherhood bonding going on. I thought they were going to high-five and fist bump right there in the parking lot.
Despite the obvious gender differences, the teaching was great. Hubs and I came away motivated and encouraged.
I’m sharing this story because many times being out of your comfort zone is the only way to grow your business, grow personally or emotionally, or even grow as a crocheter. It feels much like hang-gliding naked. I know that is a horrible visualization, but it’s exactly how it feels.
So, let’s step out of our boxes, get out of our comfort zones, and write some goals. There are many different ways to do this. Some examples:
Don’t procrastinate, just pick a way to record your goals and do it! But, make sure your goals are big and audacious enough to be dreams.
Last night, while I was at the gym, one of the machines in front of me had a tv, and there was one of those shows on. You know the kind, where the multi-millionaire businessman helps some dinky home business hit the big time. Yeah, that one. The takeaway I got from that show was DREAM BIG. Dave Ramsey said it, too, in his talk at the business conference Hubs and I attended in November: Dream Audaciously. Set your goals high! If you only make it 1/4 of the way to your goal, at least you are 1/4 farther along than you were last year.
Take your audacious goals and divide them out into monthly steps and then start walking — one step at a time — in the direction of your goals. Even if you don’t meet any of your goals, you will at least be further along the path. The key to this, when you don’t reach your goals the first month, is don’t be discouraged. Keep going.
Develop a plan and make it happen! Something amazing happens in our lives when we take the time to write down our specific goals, not just keeping them intangible thoughts in our brains.
~Dave Ramsey
You may be wondering why I am even talking about this. I hear you saying, “But, this isn’t crochet. Why is she talking about goal setting and business conferences? What is the deal?” Actually, this does apply to crochet and your yarn stash. I have been setting goals as I figure out what I have on hand for the Use Your Stash Challenge.
If everything you do is pushing you toward your goals, then everything you decide to do will go through those gatekeeper goals. This sounds a little wacky until you really think about it.
If using up a good portion of your stash is your goal, then set some audacious goals about what you will make. Challenge yourself to work as hard as you can to finish up those projects! Get ’em done, move ’em out! Commit to doing it, even if you don’t love the project anymore.
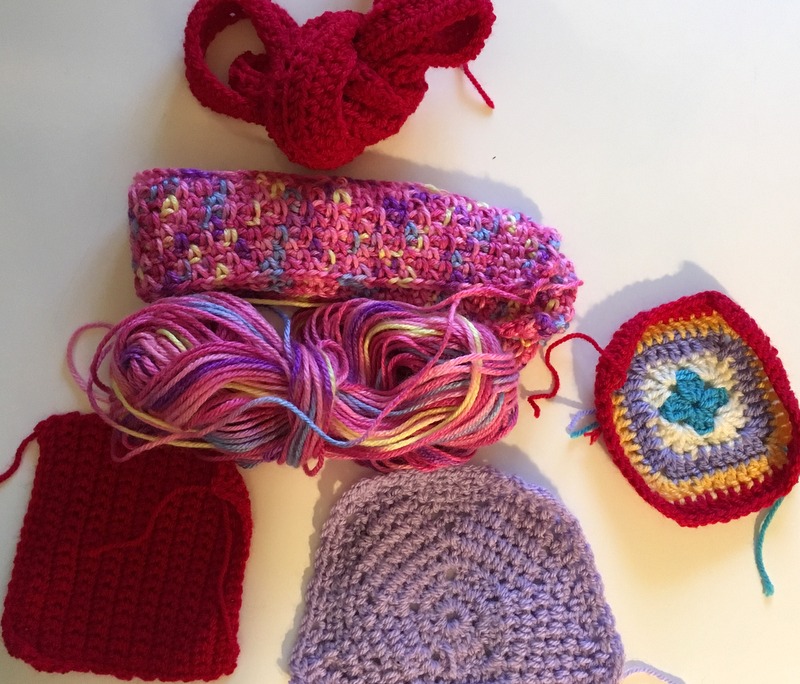
I’ve been hard at work on my goals. I set all the partially finished stuff on my ironing board (because my 6′ x 3′ table was already full), and took snapshots of each of them. The good. The bad. The downright ugly. The stuff I’ve fallen out of love with. All of it.
It’s all stretched out there, teasing me to get started. Quite frankly, I am intimidated — and a little embarrassed that I let my WIPs get so far ahead of me. They’re almost out of control.
There’s these …


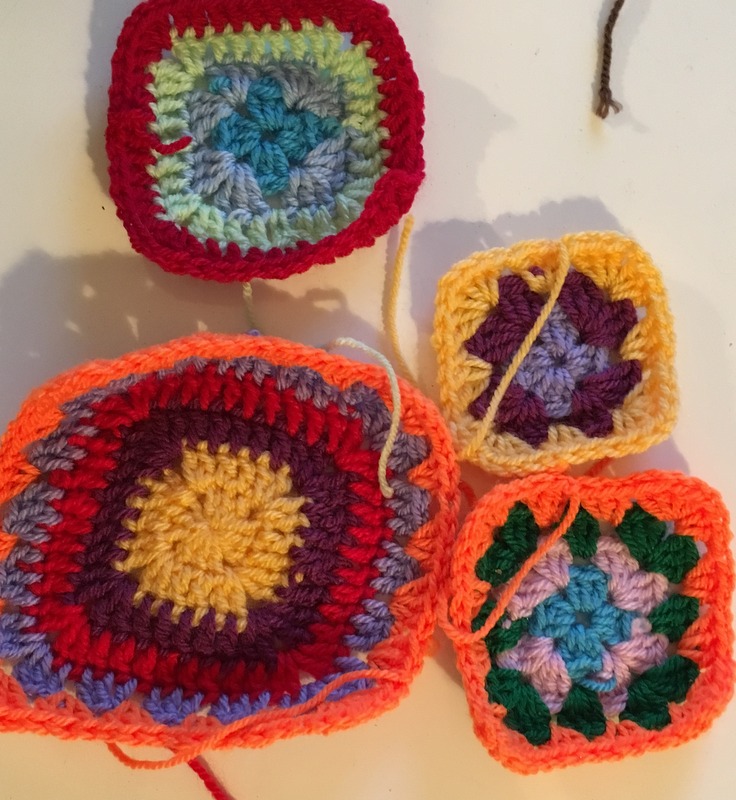
And then there are these granny square centers…


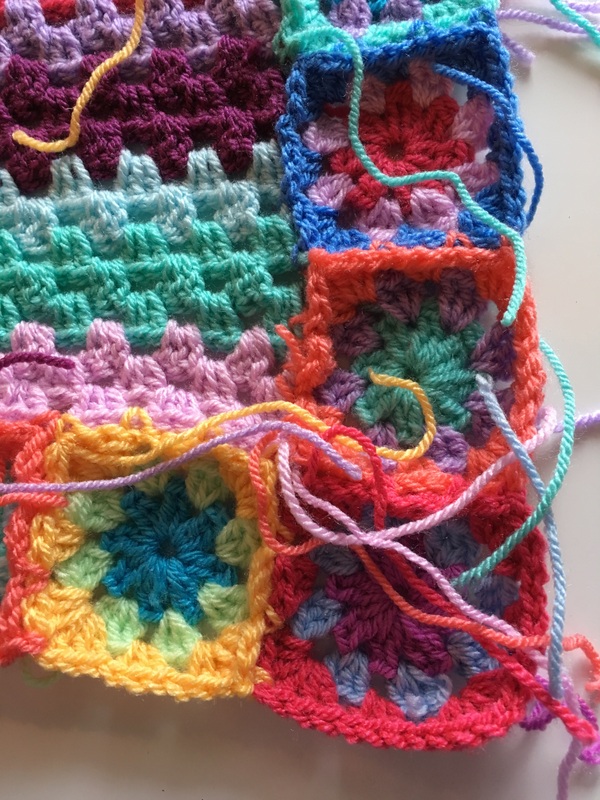
Then I found these granny squares that I tested and neglected to do anything with…


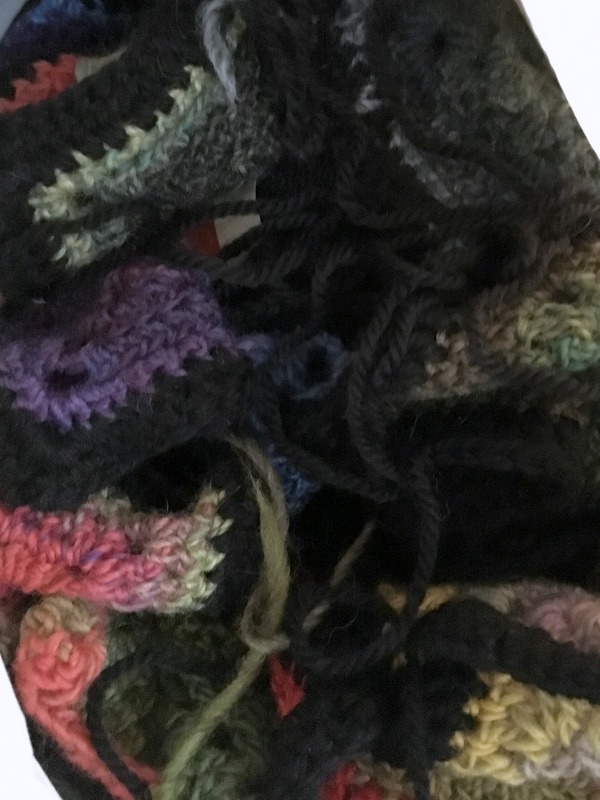
And let’s not forget the scarves, hexagons, and potholders that are unfinished…
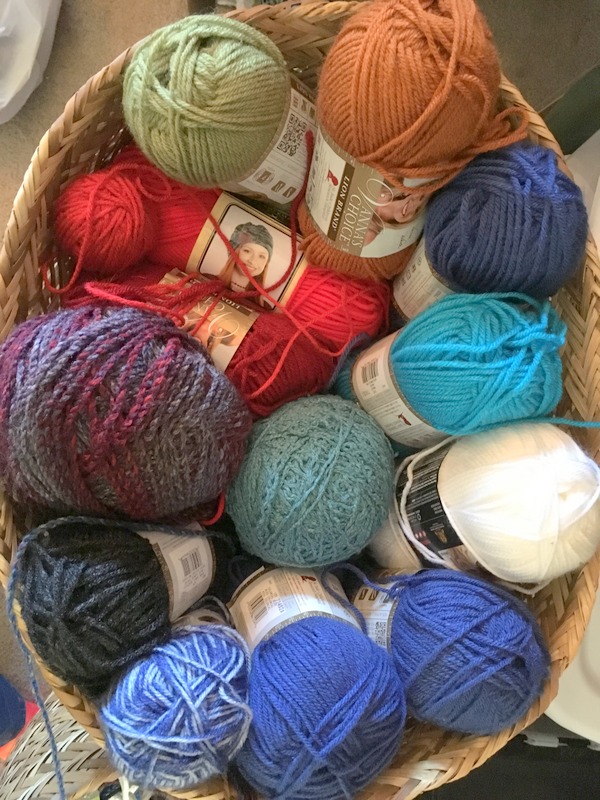
While this may all seem like a lot, I haven’t even shown you all the yarn I have squirreled away. I am pretty sure I could go a year without buying yarn. (Ha! Like that would ever happen.) But, I do need to get the stash smaller.
So, one of my audacious goals is to not buy any yarn in January and the first half of February.
My second audacious goal is to finish as many of these WIPs as I can in that same time frame. Why don’t you join me? The official start date is January 15, 2017. It will be fun to hold each other accountable, and also to encourage each other.
Talk to you later,
Karen
There are many times when I feel like a magician pulling a rabbit out of a hat — when I find myself making something out of nothing.
The list seems endless! These can be very stressful situations.
This making something out of nothing is what I love to do. I love to create things using what I have sitting around the house (often referred to as scraps).
Scrap yarn, scrap fabric, scrap art supplies, scrap odds and ends. Creating something out of what looks like nothing is a muscle which needs exercise. You could say It is a super power that doesn’t require a super suit. Our great-grandparents used this muscle daily during the Great Depression; it was just a part of life.
These days people call it recycling or green living, but it still feels a lot like making something out of nothing.
The Use Your Stash Challenge is a great way to exercise your creative muscles when it comes to using up your stash of supplies. Give yourself some boundaries (would you even wear crocheted shorts?) and create to your heart’s content!
I often allow myself to be really creative and use all my stash on hand, not just my yarn stash. Doing this helps me to create lovely things for our home. Often, during the Christmas rush, I forget to take the time to make things I like for the house I live in. January and February tend to be a nesting time for me as we pull-in and deal with ice and/or snow storms here in Oklahoma.
Scrap afghans keep me warm while I work on them, and the works-in-progress list gets smaller as the stash is used up. This allows me to make room for new yarns and projects.
Here are a few of my favorite scrap projects from my archives and some from Way, way back.


Some of these next items could be scrap busting projects if you need ideas. I crocheted or sewed all of these. They weren’t necessarily scrap projects but could easily be Use Your Stash projects. There are a bunch of ideas here that you can pick up and go with.


The items above were created out of small bits and pieces of fabric, beads, and yarn. They can all be created out of stash items.
Can you tell that I am trying to get you to join the Use Your Stash Challenge January 2017? It is an excellent way to use up your bits and pieces.

Talk to you later,
Karen
It appears as though hubs and I have entered into the redo or maintain your stuff phase of life. My card tables were in sad shape after years of school projects and art projects. Simply covering them with tablecloths didn’t change the fact that they looked awful. I have had this little idea percolating in my mind for awhile. Â I have recovered a card table chair and there would be no reason why I couldn’t recover a card table the same way. All it would take is the laminated fabric or vinyl for the top. I already had the tiny staples and staple gun left over from the chair recover (or so I thought).

Doesn’t my table top look sad, ugly and dirty. I did clean it and it just doesn’t get any better.
Pretty much all card tables have a little layer of padding under the vinyl. You can see it in the photo above where it is cut. I saved this padding to reuse as it was already cut to size and not in too bad a condition. It is the thin packing wrap that
The supplies you will need are.
Keep in mind that small children and these tools do not mix well. This is probably the reason why this job didn’t happen any sooner.

See the little brackets that are riveted to the table top then then screw into the metal table base.
Now you know if your card table is able to be recovered.
Buy your vinyl or laminated fabric for the top. Â I tried to buy a non- stripey design so it wouldn’t matter if I lined up the stripes perfectly. Un-aligned stripes drive me crazy over time. I chose vintage looking Paris postcards.
Put your card table upside down on your dining table or the floor. It is easier on your back and your knees. Using your phillips head screw driver remove all of the screws.

Take the legs off of the top and set them aside. Then start to remove all of the staples any way you can. Take a photo of the corner so that you can see how the vinyl was stapled in the corners.

It was stretched really tight and stapled a bunch.
Remove the vinyl and place your choice of top face down on your work surface. Place the padding on top and then your table top. It will make a sandwich with the top face down, then the padding and lastly the table top also face down.
Cut the top about four inches longer than you need on all four sides. This gives you something to pull on when you are stapling. We will trim the extra off later.
Staple one time in the middle on the first side.
Then I pulled the Paris fabric tight on the opposite side and put one staple in the table (through all of the layers) also in the middle. Then work one on each side of this first staple alternating opposite sides. Leave the corners alone for now.
Then staple the other two sides.
 It will  be stapled on all four sides with no corners done about 1/2 way through.
If your staples don’t go all the way in then you can get a hammer and tack them down firmly.
Then do the corners the same way as the photo stretching and stapling as you go. I tried to staple little bits instead of big folds of the vinyl.
Take the craft knife or scissors and trim the extra vinyl just on the inside of your staples away from the table edge.
Put the table base and legs back on your table top and put the screws back in.
 See Tom put the screws back in for me. He also did most of the work but that happens at my house whenever I get out the tools. He did a great job and I just did other things.

I also have vinyl left over to do the chairs as well. So I am pretty happy about this project.
Things I would watch out for before starting.
The top isn’t as tight as the original top but it isn’t wrinkled and the laminated fabric stretches more than the vinyl did. It looks good and is easy to clean. It gives new life to an old table and keeps me from wanting to buy a new card table. This is good since we have two tables and they both needed recovering. It keeps them both out of the landfill.
talk to you later,
Karen
I have found a secret for sewing bias tape to make ties or loops. I was sewing pot holders and I need to be able to sew the hanging loop. I usually use ribbon but I have a ton of bias tape. Both my Mom and my Mother in Law had tons of bias tape and I inherited it. I usually use wide double fold bias tape but this stash bias tape is really skinny. Here is my tutorial on how to sew bias tape.
You need one of these pressure feet for your sewing machine.

Here is the edge stitch pressure foot or the stitch in the ditch foot. Put the bias tape in past the feed dog so that it will be starting about an inch in on the bias tape. Adjust the needle until you get the stitching right where you want it.

I hold the bias tape down and do not pin. You can sew rather slowly and do a good job. Stopping for pins is a pain and makes your sewing a bit more jagged. I advise practicing on scrap bias tape.

I always sew the open edge first.

It is much better than I usually do sewing without this pressure foot.

Here are both sides sewn. You can see at the top of the photo that if you don’t pay attention the sewing can still get wonky. So, pay attention… the pressure foot isn’t a magic wand for perfect edge stitching but it does help a huge amount.
It has been a wild morning as we found our dogs roaming the neighborhood. After a mad dash for shoes, a quick trip in the car, they are finally both home. It gets the adrenaline running in an unpleasant way. We are all now WIDE awake and a tad bit grouchy. The dogs are happy as they have had an early morning run and breakfast!
Talk to you later,
Karen
Spring comes with a rush and with it the days fly by. It has been weeks since I have posted on the blog. I’ve not quite creating. It has been overwhelming lately with so much to do and time seems much shorter these days.
I have started this log cabin quilt after finishing  the quilt from the quilt class. This quilt is using a jelly roll of coordinating fabrics.


It is going together easily. The quilt from quilt class is finished and looks great on our bed. This is number 33 in the Use My Stash Challenge!
 Here it is quilted, bound, washed and dried to get the lovely puckery look of a quilt. It was easier to sew than I thought it would be and I learned so much. I am taking another quilting class next week. I haven’t bought my fabrics yet and I can’t find out any information about the block sizes so I can use my scraps. This might be a fabric shopping situation.
Here is the quilt I will be starting next week, or at least one in the same pattern.
